LED strip lights are some of the most versatile lighting options you can buy, and they can be used in all sorts of places around your home. One of the most popular locations for a dream LED RGB room is to add them to a ceiling.
To install LED strip lights around your ceiling, you’ll need to measure the perimeter of the room to get the right length, and use a high-quality strip with built-in adhesive. LED strip lighting works best with coving, and you’ll need to hide the power cables too.
In this article, I’m going to cover:
- A step-by-step guide on installing LED light strips on the ceiling
- How to install led strip lights on ceiling corners
- How to install LED strip lighting on a false ceiling
- The best placement for your LED ceiling strip lights
- Hiding strip lights, cables and the power source
- Whether you need coving or crown molding
How To Install LED Strip Lights On Ceiling: Step By Step Guide
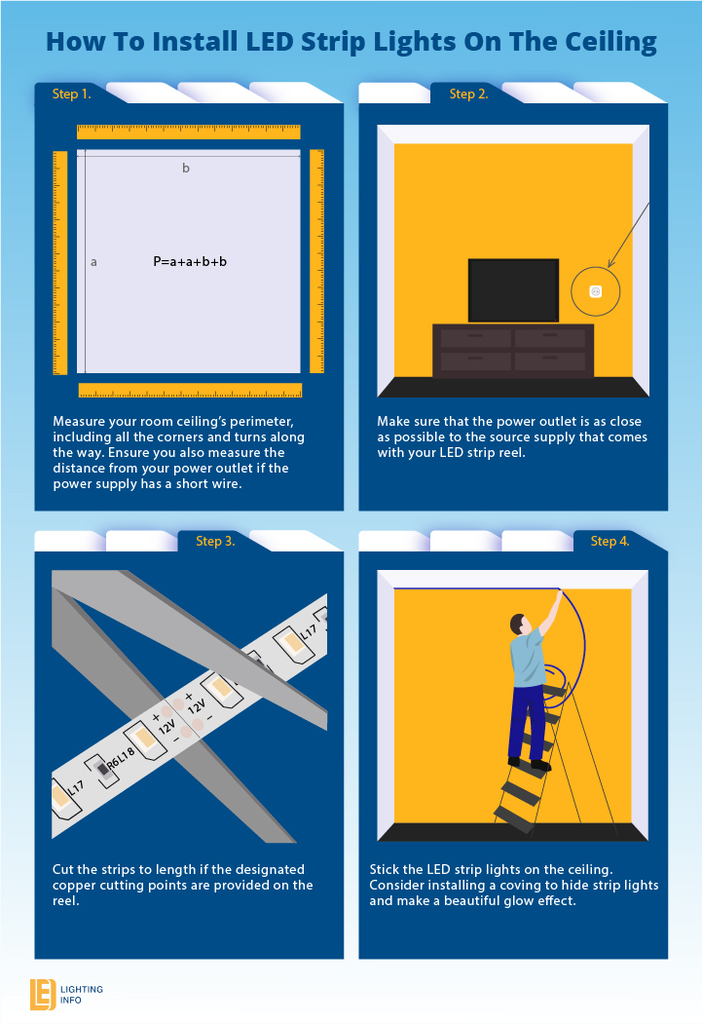
Here’s the step-by-step guide on how to install LED strip lights. However, before you start your process, plug in the LEDs, and check that they are working, then continue the project.
- Measure your room ceiling’s perimeter, including all the corners and turns along the way.
- Ensure you also measure the distance from your power outlet, if the power supply has a short wire. For optimal visual appeal and minimum wastage of extra reel or extra wiring, ensure that the power outlet is as close as possible to the source supply that comes with your LED strip reel.
- Since LED strips come in specific lengths, you can now decide whether you want one or more LED strip reels. You can easily cut the strips to length if the designated copper cutting points are provided on the reel.
- To ensure your LED strips last as long as they are designed to, your setup should be well-ventilated with airflow in the room and not stuffed behind bulky furniture or thick curtains. Also, be sure to use a heat sink that allows good heat dissipation (like aluminum, do not use wood), and is wide and deep enough for ventilation.
- Here comes the fun part. Sticking it all up! Some high-quality strips come with built-in adhesive on the back of the strips that you peel and stick. So peel the adhesive and stick where you want them to be placed.
Here is a simple perimeter calculator that tells you the total length and how many strips you need. Just fill the length of your walls.
Some manufacturers ensure the built-in tape is also designed to carry away excess heat.
Other strips need an external double-sided tape that you need to stick yourself, first to the strip and then to the wall, coving, or ceiling.
This can be a tedious process and may come loose earlier than expected.
However, suppose your ceiling has a porous or textured design. In that case, you need to consider adding external double-tape or wall adhesive to hold it up better.
Remember to peel around 3-5 inches of tape at one time to make handling it easier. If you peel more than that, you might find it accidentally sticking to the walls as you try to position it.
Measurements can go wrong, but don’t worry. If you have measured the strip before you have taped it on and find it falling short, leave the extra gap at the end of the whole length.
This way, you can add more light strips when you order again, or you can join strips you already have around.
How To Put Up LED Strip Lights On Ceiling Corners?
There are multiple ways you can run LED strip lights around a corner on your ceiling. You can cut them and then connect the strips with an L-shaped connector or soldered wire, or you can loop the wire back around on itself to avoid too sharp a bend.
It may be that you don’t need to do anything fancy – the strip may be pliable enough to be bent around a corner. However, don’t apply too much force, or you can break the circuitry inside the light strip.
If the strip will be hidden by coving, then consider the easiest option – looping the cable around. For this, if you want to turn right with the strip, you’ll instead gently bend it to the left in a full circle until it loops back around.
With this method, you’re still bending it, but more gently than a direct right turn. You just need the strip to be hidden, otherwise, the extra loop will look unsightly.
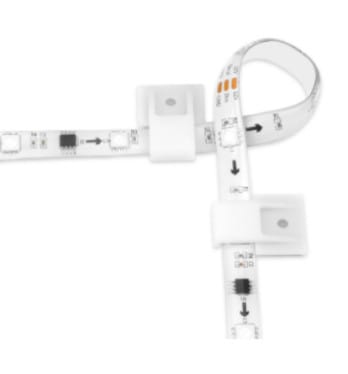
Your other options are to cut the strip wire and reconnect the two parts with a more flexible wire or with a corner connector for an LED light strip.
This will leave a neater finish, but it involves a little more work. Make your decision based on how visible the results will be, though.
Installing LED Strip Lights In False Ceiling: A Simple Guide
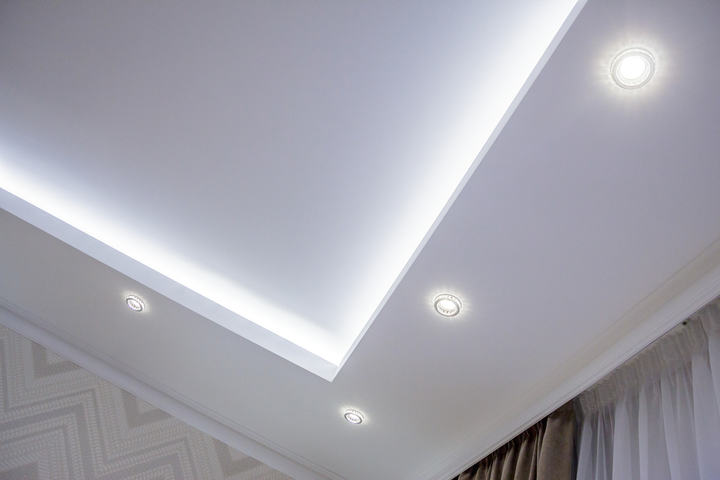
False ceilings, sometimes called a drop ceiling – where you have an extra ‘fake’ ceiling hanging below the main one – are perfect for LED strip lights. You can install LED strip lights as you would on a normal ceiling, but you need to consider how to hide the power cables once complete.
Installing strip lights on false ceiling shares many of the same challenges as installing them on any other ceiling.
The two main specific challenges come around power supply and positioning.
When it comes to the power source, you have to remember that your floating ceiling is likely to be central.
This means that to reach an outlet, you need to run the LED strips’ cables out of the false ceiling, along the main surface, and then down a wall.
Some floating ceilings do extend to the wall, so hiding the cable is easier.
But if yours doesn’t, you’ll either need to find a subtle way to cover the cable or get really clever (but also quite tricky) and run the cable through the main ceiling and to a space in the wall.
That’s a significant renovation project, though, and not one to undertake if you don’t know what you’re doing.
As for positioning, there are two options that you need to decide on.
You’ll either have the strip lights oriented vertically, attached to the frame holding up the dropped ceiling, or they’ll be horizontal, directed upwards.
If you’re attaching them to a frame that may have gaps, LED tape might not be strong enough to secure them.
You may need wide staples or a stronger adhesive for the points of contact.
If you choose to have the LEDs horizontal, make sure they’re behind a lip – your ceiling needs a lip; otherwise, you’ll still see the actual unsightly light strip.
Get them as close to the lip as possible to prevent light dots from shining onto the frame holding the ceiling up.
You could use sealed rope lights if you want a guaranteed consistent light, but this likely won’t be necessary.
One benefit of a false ceiling is that you likely won’t need to chain on as many strip lights, which could lead to a voltage drop if they are run in series.
Where Should LED Strips Be Placed On A Ceiling?
The starting point of your strips location depends on two factors:
- The location of the power outlet (which determines where you start your LED strip lights)
- How close to the ceiling you want the lights to be (which determines the focus of the illumination)
Where you start your LED strip really matters because you’ll want the power outlet to be around that area.
In case you’re an avid YouTuber or TikToker, then you definitely don’t want unsavory wires showing in your videos.
Otherwise, the wire going up from your power outlet to your LED power supply should be discreet, like behind some furniture or door or near a wall corner.
Alternatively, you can use a cable concealer cover like this one on Amazon.
Once your strip lights are plugged in, you need to decide where they need to be placed on the ceiling.
If you want more of your ceiling lit up, place the strips around 3-5 inches from the ceiling.
If you want more of your wall lit up, place the strips around a foot below the ceiling to allow enough space to glow upwards.
The most ideal way to install LEDs is where their LED individual diodes are not jarringly visible and are hidden while preventing the harsh glare given off the lights from your eyes.
Some ceilings have a built-in recession and are called drop-down ceilings, false ceilings, or suspended ceilings.
There is a small area to insert lights if needed, and in our case, the perfect place to hide exposed LED strips.
Should I Install LED Strip Lights On The Ceiling Or Wall?
Whether you install your LED strip lights on the ceiling or wall depends on whether you have coving/crown molding, and whether you want to see the strip itself or hide it.
If you want to avoid seeing the electrics/circuitry of your LED lighting then you’ll likely want to install it on the wall, hidden by the crown molding
Most of the time, you’ll want the light to either be facing out into the room, or be facing upward. This means attaching the LED light strip to the wall or onto the upper side of the coving itself.
If you attach it to the ceiling directly with the adhesive backing, it’ll be shining directly down. Some of the light may be obscured by any crown molding you have, and you’ll be able to see the strip itself.
It’s only a good idea to directly install the lights on the ceiling if you don’t have coving, provided you’re still comfortable being able to see the strip.
How To Hide LED Light Strip On Ceiling?
The ideal way to hide your LED strips is, of course, utilizing the drop-down ceiling mountings you already have in your room. Alternatively, you can install new coving to provide extra space to hide and install your strips.
Buy aluminum coving, which is a strip of aluminum with a recess to place your LED strips, and a raised lip to hide them from view.
The lip is low enough to allow the soft and mystical glow to come out.
This setup looks the best as it hides the black-colored strip with dotted lights and maintains a certain mystery and romantic aspect to the light source.
Because it’s aluminum, it acts as an effective heat sink for your LED lights as well.
So hiding ceiling LED strip lights is relatively simple – you’ve got the perfect hiding place already.
I want to tell you why it is important to hide strips.
Consider that your LED light strip will not be on the whole time at night since that would unnecessarily burden your transformer or power supply. Also, think about the daytime! In both these instances, your LEDs are off.
When the strips are off, they are not a very pretty sight to look at. They are covered in numbers, and wiring, and all the little electrical components like the diodes and resistors are visible.
Going further, your vision is also affected by uncovered LEDs. Apart from the glare, the bright undiffused light of the LEDs leaves an imprint on your eyes, which is an ‘afterimage’.
So after looking directly or indirectly at exposed LEDs, when you close your eyes, you will see tiny black dots of the lights, which results from over stimulation of the receptors in our retinas.
One more solution is to buy flexible LED profiles, which come in a lot of variety depending on the project’s needs.
An LED profile houses an LED strip completely. The light shines through a diffused surface, allowing for a lovely glow effect around the room.
When used on the floor, this kind of housing allows the LED strip to be walked over without getting damaged.
How To Hide LED Light Power Cord And Connectors?
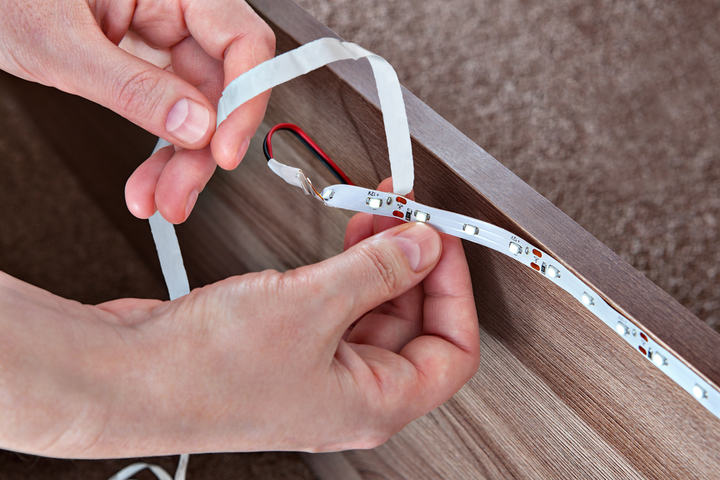
The easiest way to hide the cord is with a cord cover (Amazon). These can be made from various materials, so choose the colors that look the best in your room.
You can buy tape which you simply apply straight to the wall – it will have a raised center where the cables sit.
More common is the fixed cover, usually a slim box made from plastic.
You simply place the cables in the open box mount and then fix the cover to the wall, usually using double-sided tape. You can make it more permanent if you screw the box to the wall.
A box is usually a better option because wires can get trapped under tape if you’re not careful. It will be more visible, but they are still relatively discreet.
Once you’ve installed the cover over your connectors, most can be painted to match the shade of your wall or ceiling.
That’s why it’s always a good idea to keep any paint can leftovers! Paint the cover in the same shade, and you’ll barely notice it’s there.
Of course, with the connectors between your LED strip lights, if you buy a channel to house your strips then you don’t need to worry about the connectors anyway – they won’t be visible.
Suppose you want more of a DIY project. In that case, you can run the power cable to the power source through the actual wall using a cable faceplate (Amazon).
You’ll need someone with experience in proper cable management to do this though.
Can LED Strip Lights Be Installed Without The Coving?
You must be wondering, with all this talk about hiding strip lights, if it is such a big mistake to install any lights without hiding them?
Well, of course, you can install them as it is. In fact, if you are starting out with your LED strip light projects and only have enough budget to experiment with a reel, you may want to not get any extra coving.
Using the tape provided, you can simply stick the strip lights to the walls or ceiling directly, and it could be that you might even prefer that ‘naked’ look!
The reason to hide it in coving or recession is to reduce glare and give a more aesthetically appealing look to the room.
But if you want, you can install a dimmer to your setup and reduce the glow to achieve a less harsh light. Just make sure it’s a compatible LED dimmer.
So don’t let the absence of the added cost of coving or the hard work of installing a drop-down ceiling stop you from adding the LED strip lights!
Any LED strip lighting is better than none at all!
You can always add those features at a later time, or not at all!
Final Words
There you have it, a complete guide to take your first steps in installing an LED strip light setup on the ceiling.
You’ve got a few jobs to do before you start the install – including measuring the room to see how much lighting you need. But then the install process is relatively straight forward.
If you’re not considering your ceiling for your strip lights though, check out my guide on installing LED strips on a wall instead.

