
How Many Recessed Lights Do I Need?
Divide your square footage by actual LED wattage and you'd need 45 fixtures for a standard living room — the rule of thumb only works when you use equivalent wattage.
 Eugen
EugenEugen Nikolajev
Creator of LED Lighting Info
Hi, I am Eugen. I was always one of those kids who had all sorts of weird lighting gadgets for every occasion.
Now, I want to share my knowledge and experience about lighting with you on LED Lighting Info.
Read my editorial standards
Key Takeaways
Quick rule of thumb: multiply the room’s square footage by 1.5 (or 1.7 for kitchens, bathrooms, and workshops) to get the total wattage needed, then divide by the equivalent-incandescent wattage of your bulbs — not the actual LED wattage.
For a more accurate calculation, work in lumens: required lumens = square footage × recommended foot-candles for the room type, then divide by the lumen output per fixture.
The number of recessed lights you need depends on the size of your room, the ceiling height, the lumen output of the bulbs you choose, and how you’ll use the space. There’s a popular DIY rule of thumb that gets most rooms in the right ballpark, and a more accurate lumens-based method used by professionals — we’ll walk through both.
Here’s what we’ll cover:
- How many recessed lights you need per square foot — both the rule of thumb and the lumens-based method
- Whether you can have too many LED recessed lights
- How to space them — including beam angle and ceiling height
- Trim and housing types worth considering before you buy
How Many Recessed Lights Do I Need Per Square Foot?
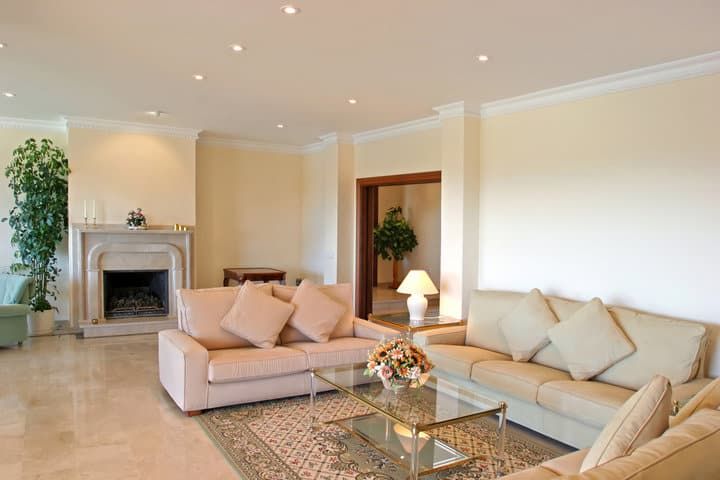
Quick clarification before the math: “recessed lights” covers a few different products. Integrated LED downlights are sealed fixtures with the LED built in. Retrofit LEDs slot into existing recessed cans. Traditional cans take a standard replaceable bulb.
The calculations below work for all three — you just need to know the lumen output (or equivalent wattage) of whichever option you’re using.
The Quick Rule of Thumb
The most widely shared formula online is straightforward, though it isn’t grounded in any official standard:
Number of lights = (Room Length × Room Width × Multiplier) ÷ Bulb Equivalent Wattage
Multiplier: 1.5 (standard rooms) or 1.7 (kitchens, bathrooms, workshops)
Work in feet, not meters. For a 12 × 20 ft (240 sq ft) living room, that’s 240 × 1.5 = 360 total watts. Using 60-watt incandescent bulbs, you’d need six fixtures.
Critical caveat for LEDs — divide by equivalent incandescent wattage, not the actual LED wattage. If you divided 360 by an 8-watt LED’s actual wattage, you’d get 45 fixtures — clearly absurd. The formula was originally calibrated for incandescent bulbs, where wattage is a rough proxy for brightness (about 12–15 lumens per watt). LEDs produce 5–8× more light per watt, so the actual-wattage version of the formula massively over-counts. Substituting equivalent wattage patches the formula, but the underlying variable that actually matters is lumens.
LED Wattage Equivalency
Manufacturers print equivalent wattage on the box (for example, “60W equivalent”). The Lighting Facts label also lists the lumen output, which is the more reliable signal — equivalency varies between manufacturers because LED efficacy varies.
| Actual LED Wattage | Equivalent Incandescent | Approximate Lumens |
|---|---|---|
| 4–5 W | 40 W | ~450 lm |
| 8–9 W | 60 W | ~800 lm |
| 13–15 W | 100 W | ~1,600 lm |
Note that an 8 W LED can range from roughly 650 to 900 lumens depending on its efficacy, so the “60 W equivalent” label is a rough approximation. Always check the lumen number when accuracy matters — and a quick terminology note: incandescent (~12–15 lm/W) and halogen (~20 lm/W) aren’t interchangeable. A 60 W halogen produces more light than a 60 W standard incandescent, so the “60 W equivalent” framing in this article anchors to standard incandescent, which is the conventional baseline.
Brighter Rooms Need More Light
The 1.5 multiplier assumes general-purpose lighting in a standard room. Kitchens, bathrooms, and workshops involve task work — chopping vegetables, shaving, soldering — so they need more illumination. Bumping the multiplier to 1.7 gets you closer, but the rule of thumb still tends to under-light task-heavy rooms compared to professional standards. For those rooms, the lumens method below is worth the extra step.
A More Accurate Method: Lumens and Foot-Candles
Lighting designers don’t use the watts-per-square-foot rule. They use the Illuminating Engineering Society (IES) recommended foot-candle levels for each room type. A foot-candle is the illuminance produced by one lumen falling on one square foot of surface, so the formula is simple:
Required lumens = square footage × recommended foot-candles
Number of fixtures = required lumens ÷ lumen output per fixture
Recommended foot-candle ranges from IES residential lighting guidelines:
| Room Type | Recommended Foot-Candles |
|---|---|
| Living room / bedroom | 10–20 |
| Kitchen (general) | 30–40 |
| Kitchen task areas | 70–80 |
| Bathroom (general) | 30 |
| Bathroom vanity | 70–80 |
| Workshop | 50+ |
Worked example, the same 240 sq ft room used as a kitchen: at 35 fc (mid-range for general kitchen lighting), required lumens = 240 × 35 = 8,400 lm. With 800-lumen fixtures, that’s about 11 fixtures — substantially more than the rule of thumb’s seven. For a kitchen with serious task work, the lumens method is the more honest answer.
Can I Have Too Many LED Recessed Lights?
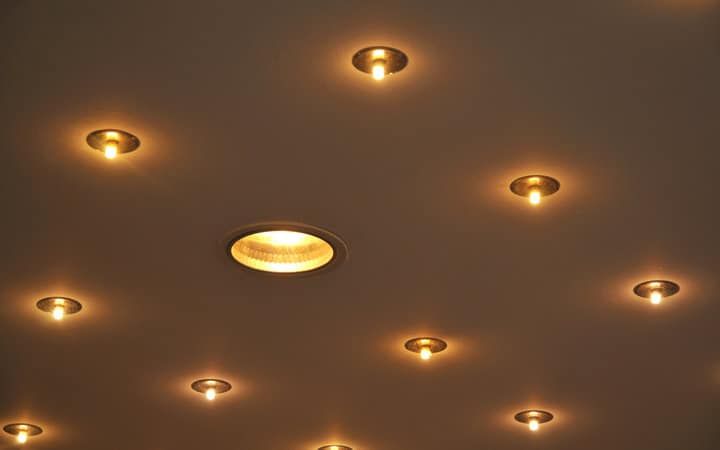
Yes — over-lighting is a real problem, especially with LEDs. It makes a relaxing space feel clinical, and it costs you on the energy bill. Validating the count before you space the fixtures is the right order of operations.
Individual downlights won’t blind you the way a direct spotlight would, but illuminance does add up where beams overlap — that’s exactly why over-lighting a small room with too many fixtures can feel harshly bright. Multiple beams hitting the same spot on the floor or counter combine additively, which is the entire basis of the spacing-overlap design principle.
Use Dimmers — and Check Compatibility
If you’ve already installed more lights than you need, a dimmer is the easiest fix. Just check compatibility before buying: not every LED recessed light is dimmable, and not every dimmer plays nicely with LED drivers. Look for “dimmable” on the fixture’s spec sheet and pair it with a dimmer rated for LEDs. Incompatible combinations cause flicker, audible buzz, or shortened fixture life.
The Cost of Over-Lighting
Wasted watts add up. Say a room only needs 6 recessed lights but you installed 10. With 8-watt LEDs, that’s 32 watts of unnecessary power. Run them 5 hours a day, every day, and you’ve burned an extra 0.16 kWh daily — about 58.4 kWh a year.
At the 2024 U.S. residential average of about $0.165 per kWh (per the EIA), that’s roughly $9.63 wasted per year — plus the cost of the extra fixtures, plus the labor. Over a 25,000-hour LED lifespan, the math gets meaningful.
Also read: How To Run Wire For Recessed Lights?
How Do I Calculate Recessed Lighting Spacing?
Once you’ve confirmed the right fixture count, you can work out how to space your recessed lighting. Get this wrong and you end up with uneven lighting — bright pools and dark gaps that always nag at you. Before reaching for the tape measure, you need two more pieces of information: your fixture’s beam angle and your ceiling height.
Beam Angle Matters
A fixture’s beam angle determines how widely the light spreads at floor level. It’s printed on the box, and for residential downlights it typically ranges from 25° (narrow / accent) to 120° (wide / wash). Two fixtures with identical lumens but different beam angles will produce completely different results with the same spacing.
- Narrow (25–40°) — focused or accent lighting; needs closer spacing
- Medium (40–60°) — general residential; works with standard spacing formulas
- Wide (60–120°) — broad coverage; tolerates wider spacing
For general ambient lighting, 60° is a safe default. Field rule: aim for about 50% beam overlap at the floor — adjacent light circles should reach the centers of each other. A 6-inch fixture with a 60° beam under an 8-foot ceiling produces roughly an 11-foot light circle at floor level, which sets a natural maximum spacing.
Ceiling Height Matters Too
Higher ceilings mean light has to travel farther, and the same fixture produces a wider but dimmer circle on the floor. The 1.5 multiplier assumes a standard 8–9 ft ceiling. For 10-foot ceilings, bump the multiplier (or lumens) up roughly 10–15%; for 12+ foot ceilings, look at higher-lumen fixtures or narrower beams.
Practical guideline: never space fixtures farther apart than half the ceiling height. So at an 8-foot ceiling, 4 feet between fixtures is your hard ceiling on spacing.
Step-by-Step Spacing
- Pick a grid based on the room shape — a rectangle for rectangular rooms, a square for square rooms, two rectangles for L-shaped rooms.
- Divide the room length by the number of fixtures in a row. That’s your bulb-to-bulb spacing along the length.
- Halve that spacing — that’s the distance from each end wall to the nearest fixture.
- Repeat for the width: divide width by fixtures-per-column to get bulb-to-bulb spacing, then halve for the wall offset.
- Cross-check against the ceiling-height rule: spacing should be no more than half the ceiling height.
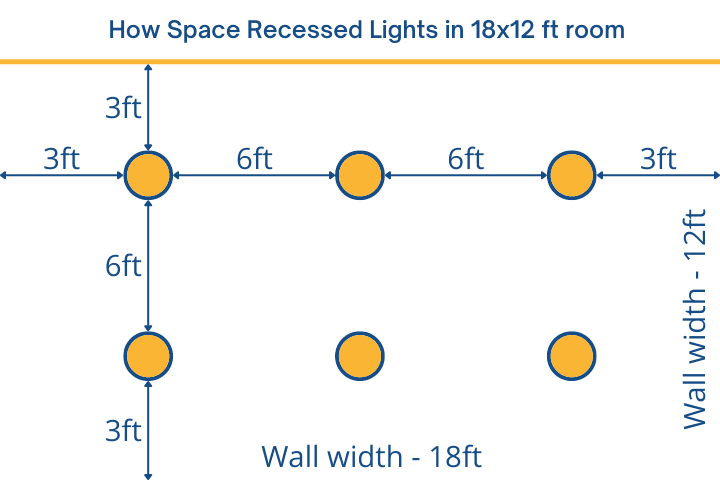
Example: an 18 × 12 ft room with six fixtures in a 3 × 2 grid. Length: 18 ÷ 3 = 6 ft between fixtures, 3 ft from each end wall. Width: 12 ÷ 2 = 6 ft between fixtures, 3 ft from each side wall. With an 8 ft ceiling, the 6 ft spacing exceeds the half-ceiling rule (4 ft), so you’d want to add a row or step up to a wider beam angle.
Trim and Housing Types to Consider
Trim — the visible ring around the fixture — affects how light leaves the housing, and the right choice depends on the room’s purpose:
- Open trim — maximum light output; the bulb is visible
- Baffle trim — ridged interior reduces glare; the standard choice for living spaces
- Reflector trim — smooth chrome interior maximizes brightness; good for kitchens and bathrooms
- Gimbal (adjustable) — lets you aim the beam, useful for accent lighting or sloped ceilings
- Wall-wash — directional trim that throws light onto a vertical surface; great for highlighting art or built-ins
Match the trim to the job before settling on the fixture count. A wall-wash trim on a feature wall changes how many overhead fixtures the rest of the room actually needs.
The Bottom Line
Three steps get you a well-lit room without over- or under-lighting it:
- Calculate how much total light the room needs — the rule of thumb (sq ft × 1.5 or 1.7) for a quick estimate, or sq ft × IES foot-candles for an accurate number, especially in kitchens, bathrooms, and workshops.
- Divide by the fixture’s equivalent wattage or lumen output to get the fixture count.
- Lay out the fixtures in a grid, accounting for beam angle and ceiling height — and never space them farther apart than half the ceiling height.
Get those right and you end up with a room that’s evenly lit, energy-efficient, and free of dark corners — without paying for fixtures you don’t need.