
How To Make A Motion Sensor Light Stay On?
A rapid on-off-on flick at the wall switch can lock many PIR sensors into permanent-on mode — no tools, no rewiring. It's built into the sensor's internal logic as a mode-change command.
 Eugen
EugenEugen Nikolajev
Creator of LED Lighting Info
Hi, I am Eugen. I was always one of those kids who had all sorts of weird lighting gadgets for every occasion.
Now, I want to share my knowledge and experience about lighting with you on LED Lighting Info.
Read my editorial standards
Key Takeaways
You can constantly keep a motion sensor light on by wiring it with a double switch or three-position switch set up to bypass the sensor in one position. Alternatively, most motion sensors will keep a light on if you switch the sensor off and then on again quickly.
Installing a motion sensor for your lighting has two main benefits.
Firstly, it means that the light will automatically switch on whenever you’re entering the area where the sensor is pointed.
And then the second benefit is that the lights will turn off when you don’t need them, saving energy (and therefore money) — and with older bulb types, extending bulb life as well.
But what about when you don’t want them to turn off? What if you’ve decided you want the light to stay on, but the sensor keeps switching it off?
In this article I’m going to cover:
- Whether motion sensors have a manual switch
- The quick on-off-on override trick (no tools required)
- Rewiring the circuit for a permanent override
- What to do if you have a smart motion sensor
- How to just make the light stay on a little longer
Does A Motion Sensor Have A Manual Switch?
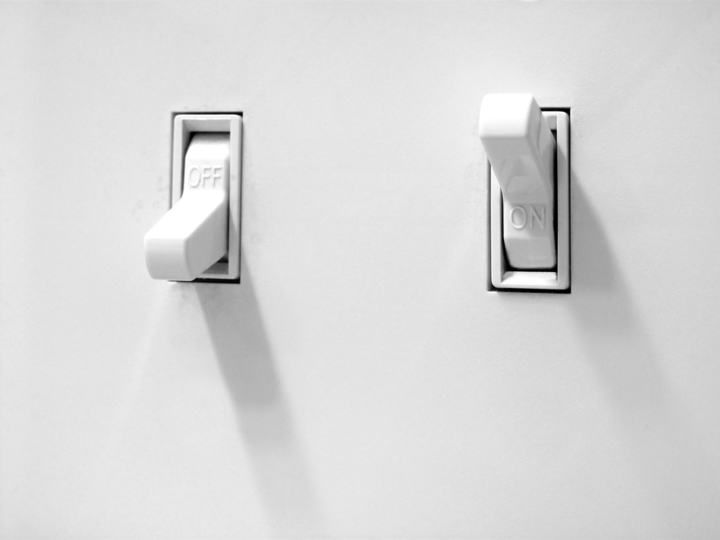
It depends on the type of sensor. Standalone outdoor PIR floodlight heads rarely include a manual override button — on those, you’re almost always dependent on the wall switch in front of them. Many indoor in-wall occupancy/vacancy sensor switches, however, do have a manual on/off override right on the faceplate.
Brands like TOPGREENER, Leviton, Lutron, and Rayzeek all sell models with this feature, so if a built-in override matters to you, look for “manual override” in the spec sheet before buying.
If you’re stuck with a sensor that doesn’t have a manual override, don’t worry — there are two reliable ways to force the light to stay on. The first is a no-tools trick that works on many sensors. The second is a small rewiring job. Let’s start with the easy one.
The Quick On-Off-On Override Trick
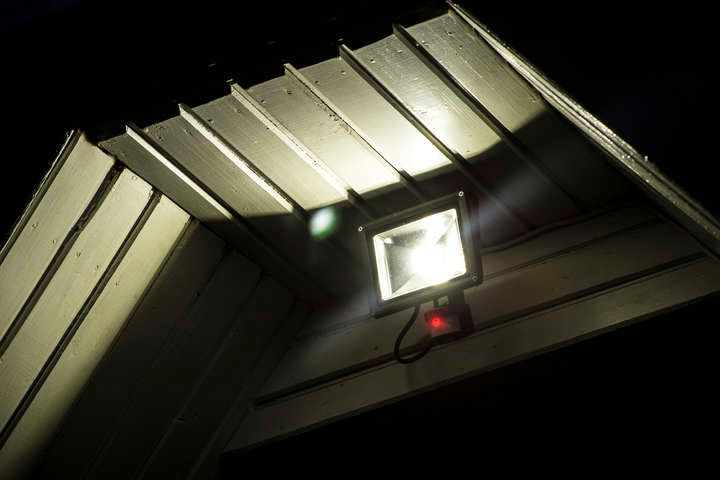
If your motion sensor is already wired into a single wall switch, you might not feel confident rewiring it — and the good news is you might not have to.
Most PIR sensors have a built-in continuous-on mode that you can activate from the wall switch. The internal logic reads a rapid power cycle as a command to enter “lights on, all the time” mode. The basic procedure is:
- Turn the wall switch off.
- Immediately turn it back on.
On some models you may need a slight variation: turn the switch off, wait at least 30 seconds (some sensors need up to a minute), then flick it on-off-on quickly. That longer wait gives the sensor’s internal circuit time to fully reset before it interprets the next power cycle as a mode-change command.
It won’t work on every sensor — newer models sometimes include power-spike resistance that defeats the trick — but it’s common enough to try first before you reach for a screwdriver.
If you have a dusk-to-dawn sensor, it’ll normally reset and start working as normal when the light levels next change. Otherwise, to put it back into normal mode, just switch it off, wait at least 30 seconds (some sensors need up to a minute), and then switch it back on.
Rewiring For A Permanent Override
If the quick-switch trick doesn’t work on your sensor, or you want a permanent, reliable way to force the light on, you can rewire the circuit with either a second switch or a single three-position switch.
⚠️ Safety first: This wiring is for line-voltage (120 V / 240 V) circuits. Always turn off the circuit breaker before touching any wiring. In the UK, this is notifiable work under Part P of the Building Regulations and must be done by a registered competent-person electrician or signed off by building control. In the US, work must comply with the NEC, and many jurisdictions require a licensed electrician. If you’re not qualified, hire someone — it’s cheap insurance against fire or shock.
Some people wonder whether a motion sensor needs a switch built into the circuit at all. Generally, it’s a good idea to have one, because you can disable the circuit entirely when you don’t want the light active. With the wiring below, you can have the circuit completely off, controlled by the PIR, or completely on at all times.
Rewiring With Two Switches
In this setup, the first switch is the master switch (it controls whether any power reaches the circuit) and the second is the override switch (it decides whether the light runs off the PIR or stays always-on). Here’s the step-by-step:
- From the supply, connect the neutral wire to a terminal that then splits to both the sensor and the light.
- Do the same with the earth wire — connect it through a separate terminal to both the sensor and the light.
- Run the live wire from the supply to the common terminal on the master switch.
- From the L1 terminal on the master switch, split the live two ways: one leg to the common terminal on the override switch, and one leg to the live terminal on the sensor.
- From the L1 terminal on the override switch, run a live cable that splits between the light and the switched-live terminal on the sensor.
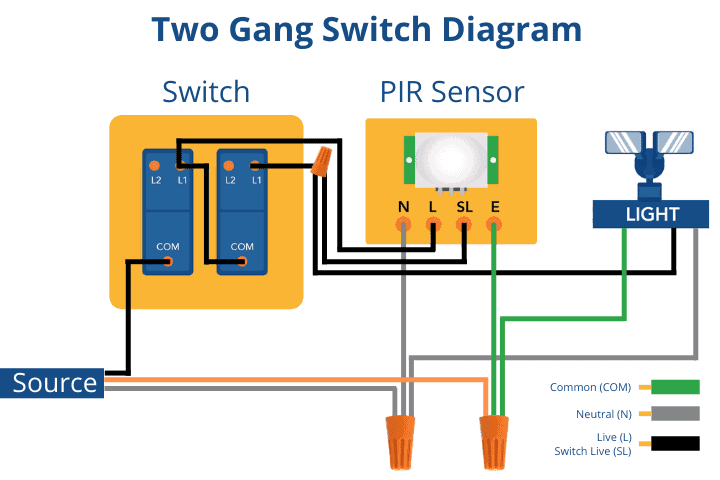
With the master switch off, the circuit is completely dead. With the master on and the override off, the light only comes on when the sensor triggers. With both switches on, the light is on constantly.
Rewiring With A Single Three-Position Switch
The same principle works with a single three-position switch (one that has two “on” positions and a center-off):
- As before, the neutral and earth wires from the supply run through separate terminals and are split between the sensor and the light.
- Run the live wire to the common terminal in the center of the switch (this is the off position).
- From the L1 terminal on the switch, run a live wire to the live terminal on the sensor.
- From the L2 terminal, split the live between the switched-live terminal on the sensor and the light directly.
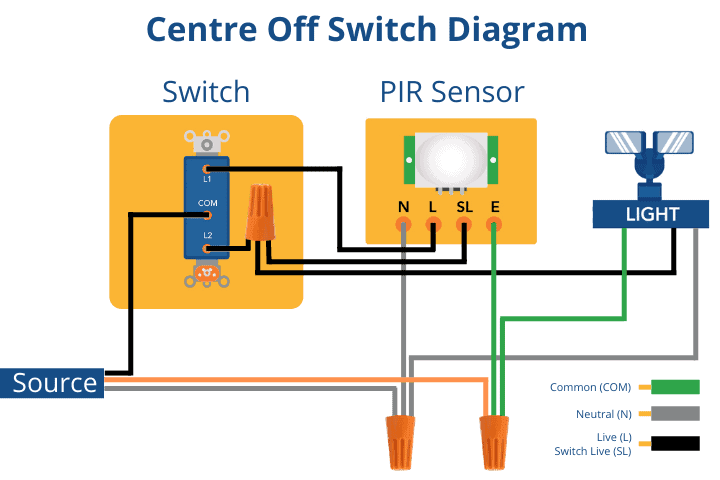
In the center position, the circuit is off. In the L1 position, the sensor is powered and the light only comes on when motion is detected. In the L2 position, the light gets constant power and stays on.
Tip: label the switch AUTO-OFF-ON so you (or anyone else in the house) don’t accidentally park it in manual-on mode and leave the light burning for days.
Switch Mode Cheat Sheet
| Setup | Switch Position | Light Behavior |
|---|---|---|
| Two-switch | Both OFF | Light off |
| Two-switch | Master ON, Override OFF | Sensor-controlled |
| Two-switch | Both ON | Always on |
| Three-position | Center (OFF) | Light off |
| Three-position | L1 | Sensor-controlled |
| Three-position | L2 | Always on |
What About Smart Motion Sensors?
If you have a smart motion sensor — Philips Hue, LIFX, Ring, Google Nest, or similar — skip the rewiring entirely and check the app first. Most smart systems let you set a permanent “always on” mode, build a schedule, or temporarily disable motion-triggered behavior straight from the settings menu. The override is usually just a toggle.
One caveat worth flagging if you’re running LED bulbs on a PIR circuit: some older PIR sensors have a minimum load requirement that LEDs don’t meet, which can cause flickering, ghost triggering, or the light refusing to turn fully off. If you’re seeing any of those symptoms after swapping to LED, look for a PIR sensor explicitly marked as LED-compatible.
How To Make A Motion Sensor Light Stay On Longer
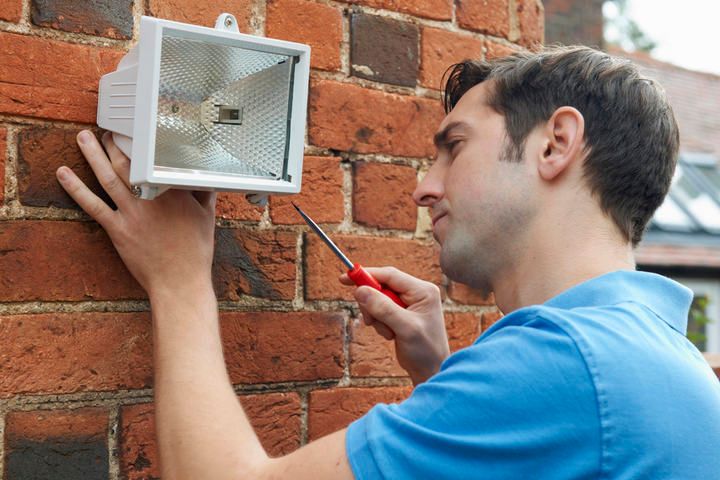
If you don’t actually need the light on permanently — just a bit longer once it’s triggered — there’s a simpler fix. This won’t keep it on endlessly, but it stops the light from switching off too quickly.
Most PIR sensors have a time-delay dial — a small potentiometer somewhere on the body of the unit. It may be marked with seconds or minutes, or it may be unmarked. Either way, turning it clockwise extends the time the light stays on after each trigger. On typical domestic PIRs this ranges from around 5 seconds up to about 5 minutes.
The Other Dials On Your Sensor
A dusk-to-dawn sensor will also have a lux dial. This controls how dark it needs to be before the sensor arms itself. Setting a lower lux value means the sensor only activates in darker conditions — useful if you don’t want it triggering at dusk or on overcast afternoons. A higher value arms it earlier.
Some PIRs also have a sensitivity dial, which controls the amount of motion or heat change required to trigger the light. Turn it down if a nearby tree, flag, or passing cat keeps setting the sensor off.
Also read: Do Motion Sensor Lights Have Cameras In Them?
Final Words
Outdoor PIR sensors rarely come with a dedicated manual override button, but that doesn’t mean you’re stuck. You have three good options: try the quick off-on (or off-wait-on-off-on) trick at the wall switch, rewire the circuit with a double switch or three-position switch for a permanent bypass, or — if your sensor is smart — just toggle it in the app.
And if you only needed a little extra time on the light, the time-delay dial on the sensor itself will usually get you there without any wiring at all.
Did the quick on-off-on trick work on your sensor model?