
Can A PIR Sensor Be Connected To Any Light?
A CFL triggered by a motion sensor glows dimly for up to 3 minutes before hitting full brightness — plenty of time for an intruder to walk away unbothered.
 Eugen
EugenEugen Nikolajev
Creator of LED Lighting Info
Hi, I am Eugen. I was always one of those kids who had all sorts of weird lighting gadgets for every occasion.
Now, I want to share my knowledge and experience about lighting with you on LED Lighting Info.
Read my editorial standards
Key Takeaways
A PIR sensor will work with any kind of light, but it isn't equally effective with every type of bulb. Incandescent and halogen bulbs wear out faster under constant switching, and CFLs take time to reach full brightness — both of which defeat the point of a motion light. LEDs are the right answer for almost every PIR install.
Do PIR sensors work with any kind of light, or do you need to limit them to certain types of bulbs?
Below, I'll cover:
- How well PIR sensors work with each common bulb type
- How to add a PIR sensor to existing outdoor lights
- Three ways to wire a PIR sensor — including an always-on override
Is A PIR Sensor Compatible With Any Light?
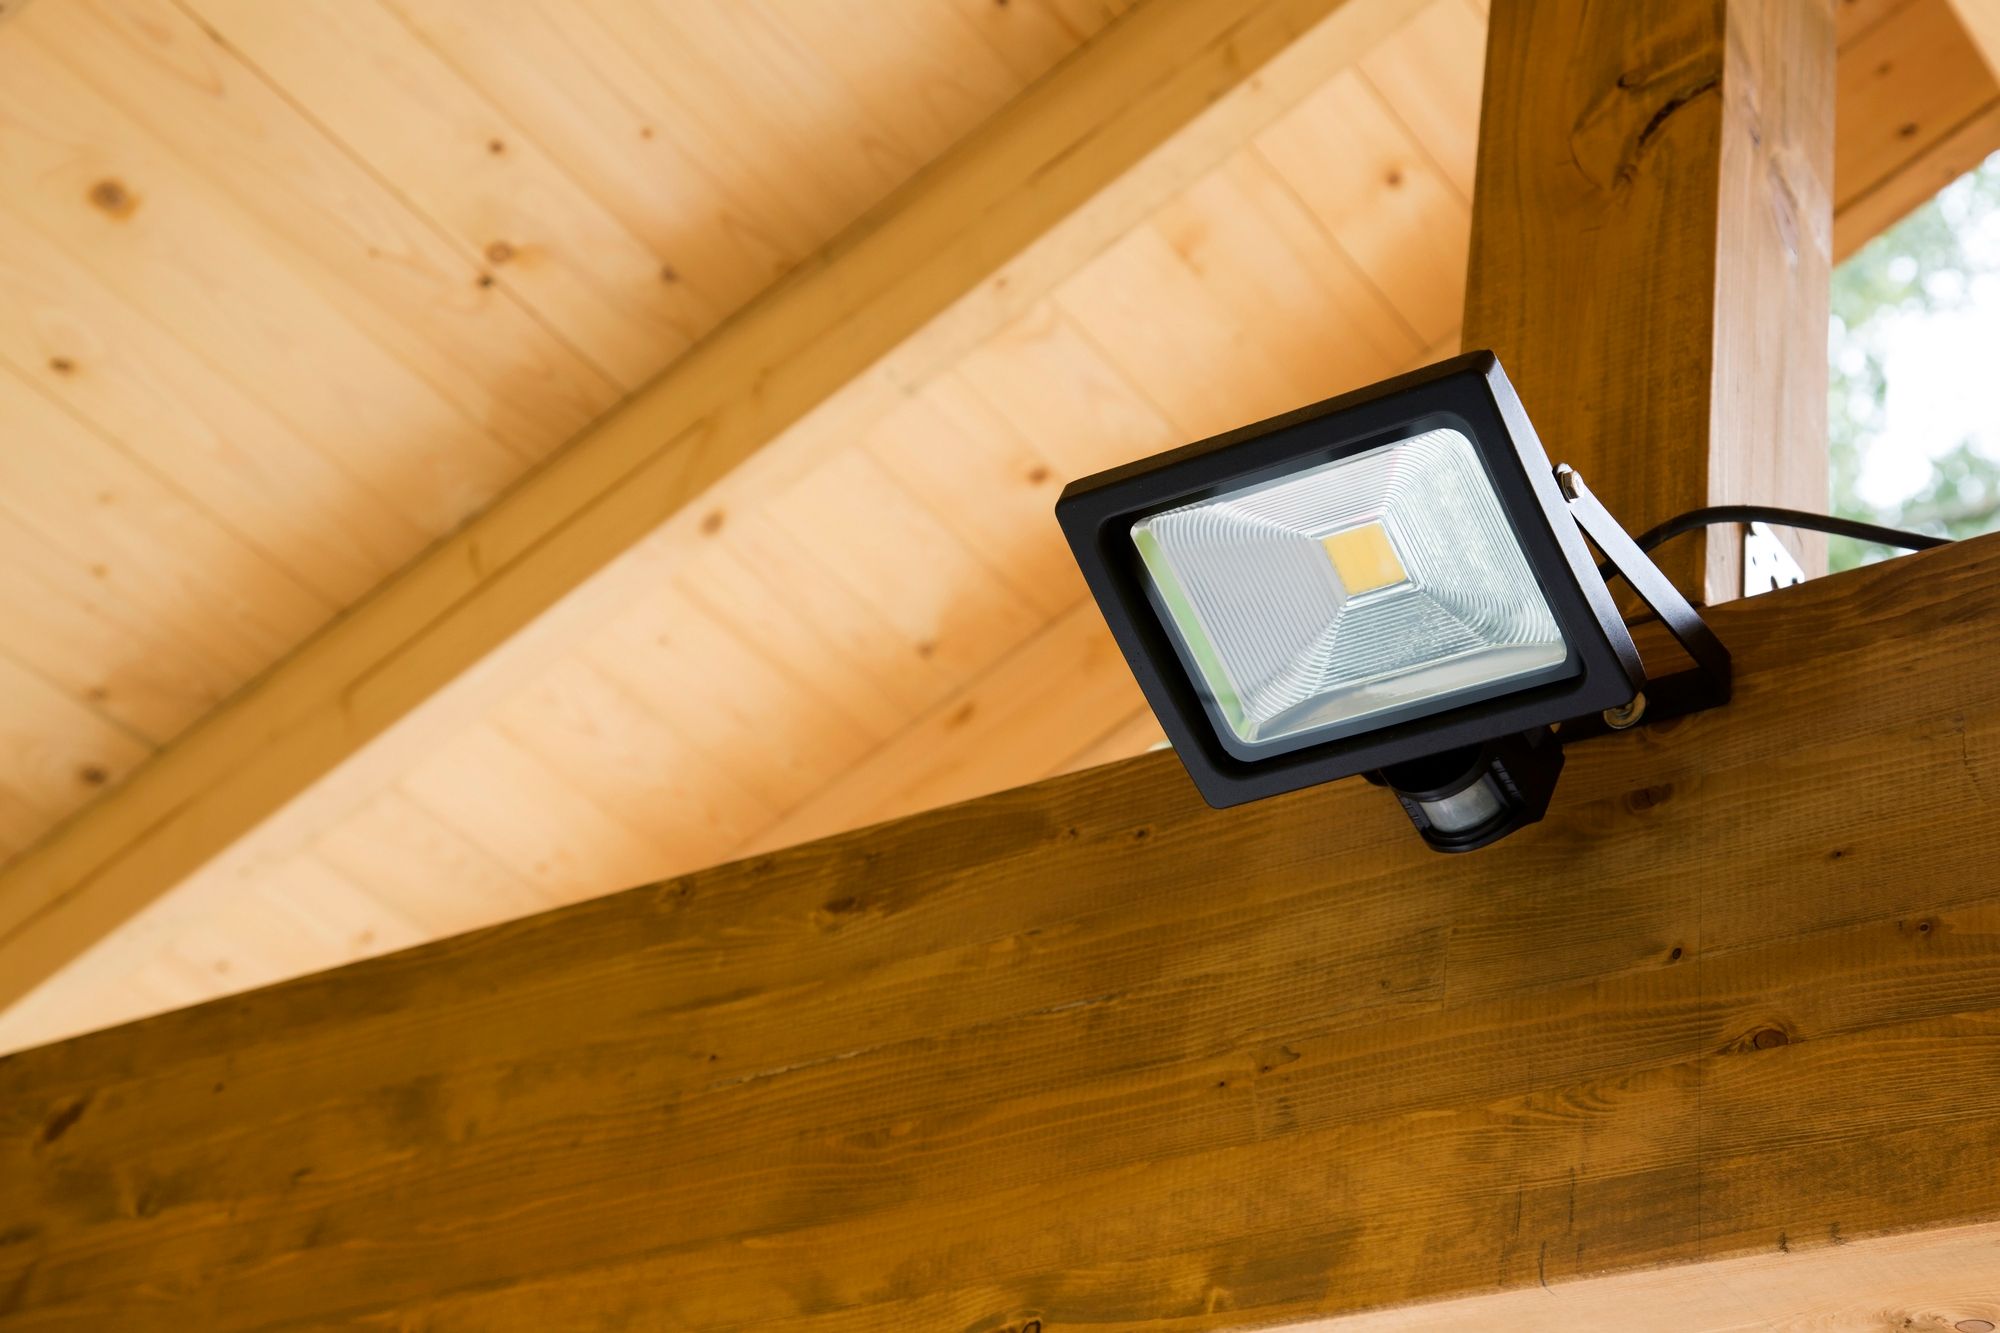
A PIR sensor works with pretty much any light. It's essentially a self-triggering light switch: it sits in the off position until it detects movement, closes the circuit just like a flicked switch, and opens it again after a set delay when no more movement is detected.
So if a fixture works with a regular wall switch, it will work with a PIR. Where a motion sensor differs from a normal light switch is in how it cycles the light:
- It turns off automatically a short time after switching on
- It re-triggers every time it sees movement
- It's typically used where you need instant light — to startle an intruder, or to see hazards in a dark outdoor space
Those three behaviours — short cycles, frequent re-triggers, and the need for instant brightness — are why bulb choice matters.
Incandescent and halogen
Incandescent and halogen bulbs work by passing current through a metal filament that heats up and glows. The filament wears out over time, but rated lifetime in hours assumes normal use — not the constant on/off cycling a PIR delivers.
Department of Energy figures suggest an incandescent bulb rated for 1,000 hours can last only 500–600 hours when cycled every 15 minutes. The damage comes from thermal expansion stress and the inrush current spike when a cold filament has lower resistance — exactly the conditions a PIR creates every time someone walks past.
Compact fluorescents (CFLs)
CFLs don't have the filament problem — they pass current through a gas — but they have a different one: warm-up time. ENERGY STAR-qualified CFLs are required to reach at least 80% of full output within 3 minutes, and many modern bulbs are noticeably brighter within the first few seconds. Older or covered/reflector CFLs sit at the slow end of that range.
Imagine someone trying to break into your home, and they trigger the motion sensor. They hear the click of the relay and see only a dull glow that slowly brightens. By the time the bulb hits full output, they've calmly walked off — exactly the failure mode a motion light is supposed to prevent.
LEDs
LEDs are the right choice for motion lights. The semiconductor doesn't wear out the way a filament does, and standard LEDs reach full output in under 100ms — the ENERGY STAR program caps LED start time at 500ms. A few specialty LEDs (smart bulbs, vintage filament-style, or anything with a Wi-Fi/Bluetooth radio) have noticeable startup delays of 0.5–5 seconds, but those are the exception.
| Bulb Type | Works with PIR? | Instant-On? | Switching Wear? | Recommended? |
|---|---|---|---|---|
| Incandescent | Yes | Yes | High | No |
| Halogen | Yes | Yes | High | No |
| CFL | Yes | No (slow warm-up) | Low | No |
| LED | Yes | Yes | None | Yes |
One catch: minimum load with no-neutral PIRs
There's one compatibility gotcha worth flagging if you're pairing a PIR with a low-wattage LED. Many 2-wire PIR sensors — the kind that don't connect to a neutral — have a minimum load requirement, typically 25–40W. They leak a small "bleed current" through the bulb to power their own electronics, and a single 8W LED may not draw enough current to keep the circuit stable.
Symptoms are flickering, ghost switching, or a faint glow when the light should be off. Fixes, in rough order of cost:
- Use a 3-wire PIR with a neutral connection
- Pair the PIR with multiple LEDs in the fixture so the combined load clears the threshold
- Switch to a higher-wattage LED
- Add a load-correction (bypass) capacitor at the fixture
Can A PIR Sensor Be Added To Existing Outdoor Lights?
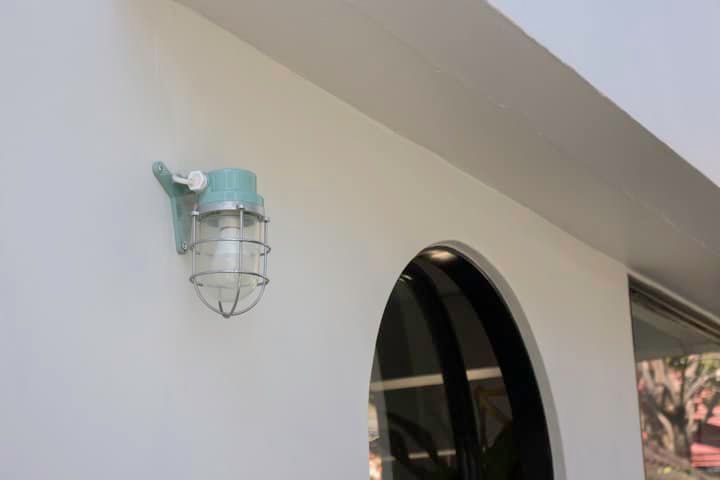
If you already have an outdoor lighting setup, you can add a PIR sensor. There are three options, two of which are very easy provided your fixture is compatible.
Option 1: Wire a standalone PIR into the circuit
The hardest of the three. The theory is simple — install the sensor on the same circuit as the lights — but the execution depends on whether your existing wiring runs close to where you want the sensor to point.
If it doesn't, you'll need to re-wire to bring a cable to the sensor's mounting position. If it does, mount the sensor and wire it into the circuit. Switch off the power at the consumer unit before you start. Any drill works on a wooden frame; you'll need masonry bits for brick. Wiring instructions are below.
Option 2: Motion sensor adapter
Motion sensor adapters (Amazon) screw into any standard bulb socket. Remove the bulb, screw in the adapter, then screw the bulb into the adapter. The adapter is the PIR and includes the usual sensitivity, time-delay, and dusk-to-dawn controls.
Option 3: Motion sensor bulb
A motion sensor bulb (Amazon) puts the PIR inside the bulb itself, so there's no adapter needed — just swap the existing bulb for the new one.
Adapters and motion sensor bulbs won't fit every fixture — check the form factor will physically sit inside the housing — but for simplicity, they can't be beaten.
A few notes for outdoor installs
IP rating. A PIR sensor exposed to the weather needs an Ingress Protection rating. IP44 (splash-proof) is the minimum for a covered porch or eave; IP65 (jet-proof) is what you want for fully exposed locations.
Detection range and angle. Most PIRs are adjustable for sensitivity, range (typically 6–12 metres), and detection angle (commonly 120°–180°). Set these once installed — factory defaults tend to be wider and more sensitive than you actually want, which leads to nuisance triggering from passing cars and wandering animals.
Time delay. Most PIRs have a delay knob (often labelled "TIME") that controls how long the light stays on after the last detection. Start short — 30 seconds is plenty for a porch — and lengthen it if you keep walking back into the dark.
How To Correctly Wire A PIR Sensor
If you're going the standalone-PIR route, here's how the wiring works. There are three common configurations.
A PIR sensor has three terminals: live (L), switch live (L′), and neutral (N). Some include a ground/earth terminal. In US fixtures these are typically labelled Line, Load, and Neutral. The "switch live" or "load" terminal is the wire that goes to the light fixture — it's only energised when the sensor decides the light should be on.
Option 1: Basic PIR only
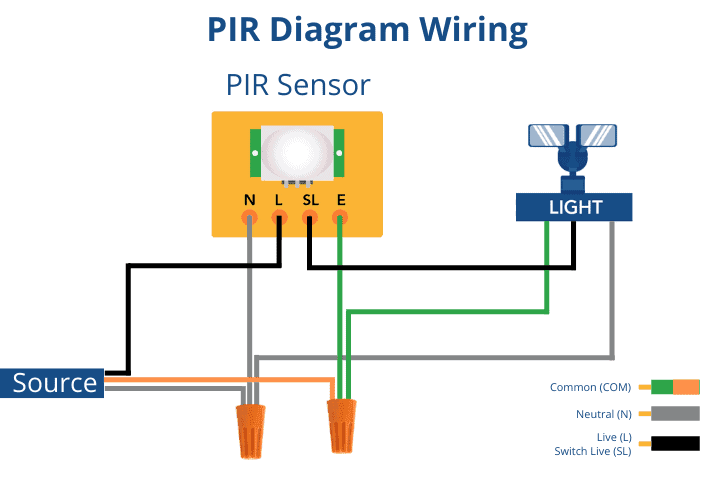
- Wire the mains live to the L terminal.
- Wire the mains neutral to the N terminal.
- Run the load wire from the switch-live (L′) terminal to the live wire on the light fixture.
- Connect the light's neutral to the same neutral run, typically with a wire nut joining it to the mains-to-sensor neutral cable.
Option 2: Switch-controlled PIR
This setup lets you cut power to the PIR (and the light) entirely from a wall switch — useful when you don't want the lights triggering at all, e.g. during a party with people moving in front of the door.
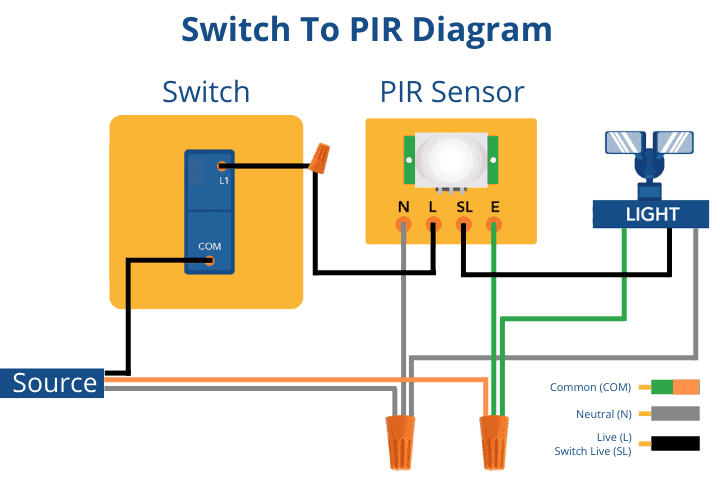
- Wire the mains live to one side of a single-pole wall switch.
- Run the switched output from the other side to the L terminal on the PIR.
- Wire the rest of the PIR exactly as in Option 1 — neutral to N, switch-live (L′) to the light, and the light's neutral back to the neutral run.
Option 3: PIR with always-on override
Trickier, but the most flexible: a wall switch overrides the PIR so the light is always on when the switch is up, and PIR-controlled when it's down.
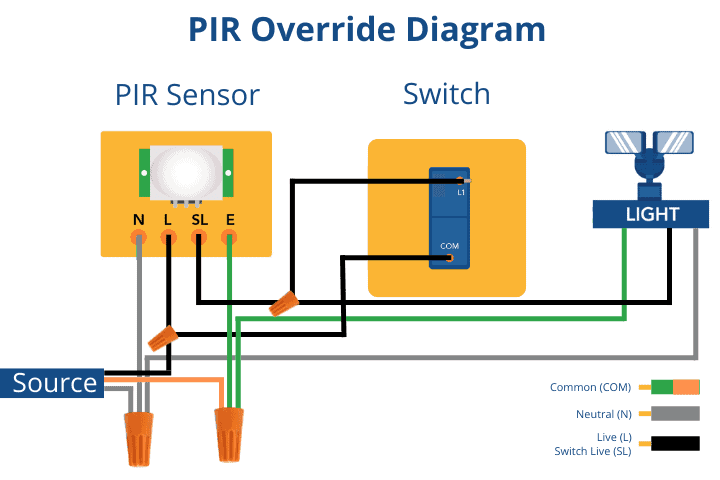
- Wire the mains live to the PIR's L terminal.
- Run a second wire from that same L terminal to one side of a single-pole switch.
- Wire the load from the PIR's switch-live (L′) terminal to the light fixture.
- Run another cable from the other side of the switch back to the PIR's L′ terminal — bridging the switch output and the PIR's output.
- Wire neutrals as in Option 1.
With this circuit, if you leave the light switch off, the PIR controls the light. Flip the switch on and the mains is connected directly to the light, bypassing the PIR — the light stays on until you switch back off.
Final Words
PIR sensors aren't complicated, but a few choices upfront make a real difference:
- LEDs are the right bulb. Instant-on, no filament wear, decades of switching cycles.
- Watch the minimum-load spec if you're using a no-neutral PIR with a single low-wattage LED — flickering and ghost switching are the tell.
- Pick an IP-rated sensor for outdoor mounting: IP44 minimum, IP65 for fully exposed positions.
- For installation, choose between a standalone PIR (most flexible), a motion-sensor adapter (easy retrofit), or a motion-sensor bulb (zero wiring).
If you're comfortable wiring components, my recommendation is a standalone PIR with the always-on override configuration — you keep automatic control day-to-day but can force the light on when you need it. If you're not, an adapter or bulb gets you 90% of the benefit with none of the consumer-unit work.