
Can You Add Motion Sensors To Existing Outdoor Lights?
Most PIR sensors treat the wall switch as optional — the sensor and your existing fixture are two separate things, and splicing one in rarely means touching anything beyond the junction box.
 Eugen
EugenEugen Nikolajev
Creator of LED Lighting Info
Hi, I am Eugen. I was always one of those kids who had all sorts of weird lighting gadgets for every occasion.
Now, I want to share my knowledge and experience about lighting with you on LED Lighting Info.
Read my editorial standards
Key Takeaways
You can install a motion sensor into an existing lighting circuit as long as you have access to the wiring. From the lamp's perspective, the sensor behaves like a normally-open switch that closes when motion is detected — but the device itself is active electronics that need their own power, which has wiring implications we'll cover below.
Most people picture a motion sensor as something baked into a security floodlight — one fixture, one decision. But the sensor and the light are usually two separate things, and you can add a motion sensor to a fixture you already own without ripping anything out.
In this guide:
- Why motion sensors are worth adding outdoors
- What kind of sensor to buy (PIR vs. microwave vs. dual-tech, plus IP and load ratings)
- How to wire one into an existing fixture — safely and to code
- How to dial in sensitivity, time-on, and daylight lockout once it's installed
Are There Any Benefits to Motion Sensors for Outdoor Lights?
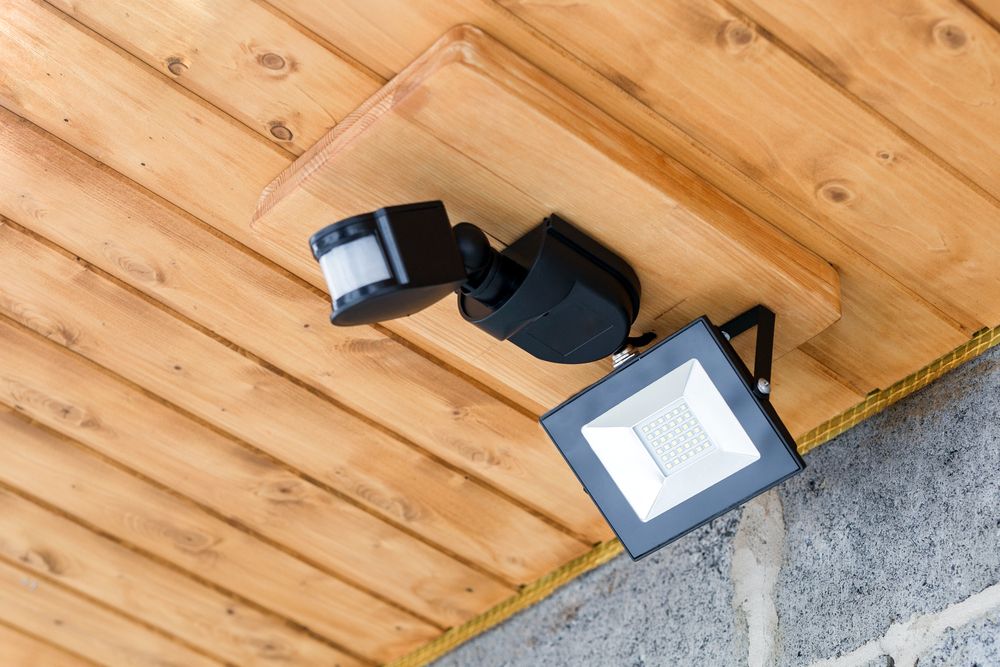
Outdoor sensors tend to behave themselves better than indoor ones — you're rarely sitting still on the porch the way you are at a desk, so unwanted re-triggers are less of a problem. Don't worry about wasting electricity, either: many outdoor motion sensors include a built-in photocell (sometimes marketed as a "dusk-to-dawn + motion" sensor) so the lamp only arms after dark and stays off during daylight.
A photocell on its own controls the light by ambient brightness only; a PIR sensor on its own reacts to motion only. The combo device gives you both — read on for more on the electricity-saving side.
| Benefit | How motion sensors help |
|---|---|
| Security | Lights up intruders for cameras and neighbors to see |
| Safety | Illuminates steps and uneven paths automatically on arrival |
| Wildlife deterrent | Startles light-sensitive species — though some animals habituate quickly |
Security
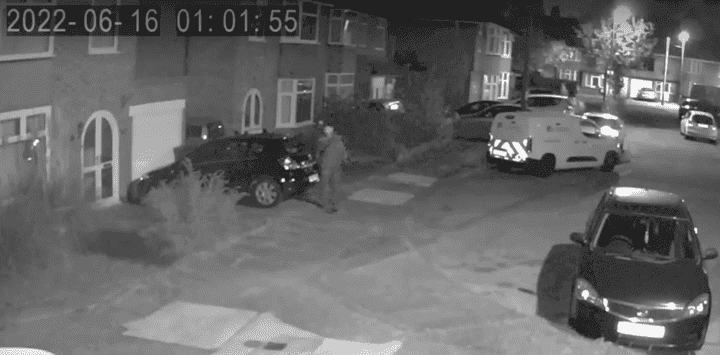
Motion-triggered exterior lights aren't just so you can see where you're going — they're a deterrent. Criminals know the trigger is automatic, but a sudden flood of light still increases the odds of being caught on a camera or noticed by a neighbor — and that's enough to send most opportunistic intruders looking for a darker target.
🏡 Neighborhood story: Recently in our neighborhood, someone was walking the street at night checking parked car door handles. The motion lights kicked on as he moved between driveways, neighbors saw what was happening, and the intruder run away before any cars were broken into.
Safety
Outdoors, hazards stack up: uneven paving, garden steps, the loose flagstone you've been meaning to fix. Coming home late, the last thing you want is to twist an ankle on a step you couldn't see. A motion sensor lights the path automatically the moment you arrive, without you fumbling for a switch.
Wildlife Deterrent
Lots of US homeowners deal with active wildlife — raccoons in the trash, deer in the vegetable garden, the occasional coyote eyeing a pet. Some species are spooked by sudden lights, and a motion sensor (one calibrated to trigger for animal-sized targets) can buy you a quieter night.
Temper your expectations, though: raccoons, opossums, and deer all habituate to motion-triggered lights fairly quickly and may stop reacting after a few weeks. Treat it as one layer of deterrent, not a permanent solution.
What Kind of Motion Sensor Should You Buy?
Before you wire anything, get the right sensor. Three things matter: detection technology, location rating, and the load it has to switch.
| Sensor type | How it detects | Best for |
|---|---|---|
| PIR (passive infrared) | Reads changes in body-heat IR signatures across its lens segments | Standard outdoor residential use — what you'll find on the shelf |
| Microwave | Emits microwave pulses and measures the reflected echo | Long-range or hidden installs, but can trigger through glass and thin walls |
| Dual-technology | Requires PIR and microwave to agree before firing | Reducing false triggers in busy environments |
For a typical porch, garage, or garden retrofit, a PIR sensor is the right answer 9 times out of 10.
Outdoor (wet/damp) rating
If the sensor will be mounted outdoors, both the sensor and its enclosure must be listed for the location. Look for a UL wet-location or damp-location marking on the package, or an IP65 (or higher) ingress-protection rating. NEC Article 410 requires luminaires and accessories in damp or wet locations to be listed for the location, and outdoor boxes and covers must be weatherproof per NEC 314.15. A standard indoor PIR switch will fail within a season if you bolt it to an exterior wall.
Load rating and LED compatibility
Every PIR sensor lists a maximum switchable wattage — typically separate ratings for incandescent, LED/CFL, and motor loads. Check the spec on the box and total up the lamps you're switching.
There's a quieter pitfall on the low end too: many older sensors were designed for incandescent loads and don't switch cleanly with a single low-wattage LED. The result is flickering, ghosting (a faint glow when "off"), or a sensor that simply won't trigger. If you're driving a small LED fixture, look for a sensor explicitly rated "LED compatible" with a low minimum load — or add a non-LED bulb to the circuit to give the relay something to bite on.
Can I Add A Motion Sensor To A Porch Light?
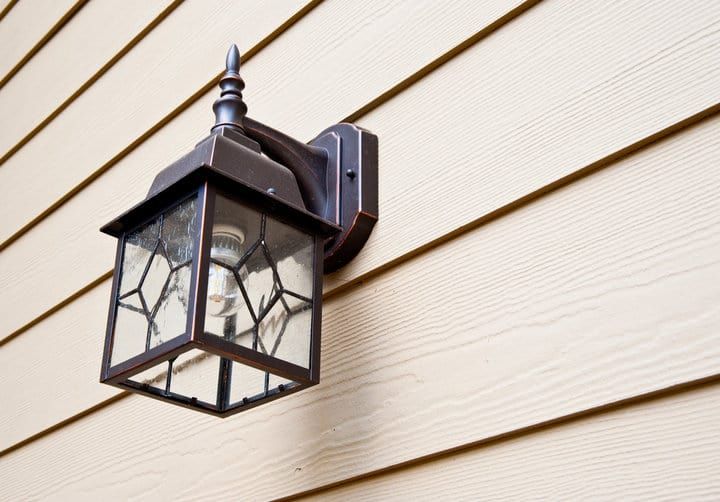
Yes — and porch lights are some of the best candidates. How often do you actually want to flip a porch light on by hand? Far more useful to have it kick on when someone walks up the steps.
The only thing that can stop you is access to the wiring. You need to decide where the sensor will sit so its detection cone covers the area you care about, then figure out how to feed it power. Two scenarios:
- Sensor at the existing fixture — the easy case. The wiring is already there. You drop the fixture, splice the sensor in, and reinstall.
- Sensor in a different location — harder. You'll need to run new cable from the existing circuit to the sensor's mounting point, which usually counts as new branch-circuit work and may require a permit (see below).
Related: Can You Wire Two Motion Sensors In A Circuit?
How Do I Wire Motion Detectors To An Existing Light Fixture?

⚠️ Safety first: switch the circuit off at the breaker (not just the wall switch — those get mis-mapped) and verify the wires are dead with a non-contact voltage tester before you so much as nudge a conductor. If you're not comfortable working in a live panel or interpreting the NEC, this is a job for a licensed electrician.
📋 Permit note: Swapping a fixture or switch on an existing circuit usually doesn't need a permit. Running new cable to a remote sensor location generally does — it counts as new branch-circuit work under most jurisdictions' adoption of the NEC. Permit and inspection rules vary by state and city, so check with your local building or electrical-inspection department before pulling new cable.
From the load side, a PIR motion sensor behaves like a normally-open switch that closes when motion is detected. Internally, though, it's an active device — a pyroelectric IR detector and signal-processing IC drive a relay or triac, and the electronics draw a small standby current continuously. That's why most line-voltage models require a neutral conductor at the sensor location to power themselves. Specialty "no-neutral" sensors exist for retrofits in older boxes, but treat them as the exception, not the default.
Option A: Sensor attached to the existing fixture
This is the common case — the wiring is already at the fixture, and most modern PIR-fixture combos are 4-wire (line, load, neutral, ground).
- Switch off the power at the breaker and verify the wires are dead with a non-contact voltage tester before touching them.
- Remove the existing fixture, exposing the junction box and the conductors inside.
- Connect the sensor's line/hot terminal (often labeled "L," usually black) to the incoming hot supply.
- Connect the sensor's neutral terminal (often "N," usually white) to the supply neutral.
- Connect the sensor's load terminal (often red) to the wire feeding the light fixture.
- Connect the green or bare ground wire to the sensor's ground terminal and to the fixture/box ground. Outdoor metal fixtures need a verified ground path.
- Mount the sensor and reinstall the fixture per the manufacturer's instructions.
- Restore power at the breaker and test.
If your sensor is sold as "no-neutral required," follow its manufacturer's wiring diagram instead — those models are the exception.
Option B: Remote sensor in a different location
If you want the sensor to cover an area the existing fixture can't see, you'll run new cable from the circuit to the sensor's mounting point. The sensor's terminal layout is the same as Option A: line in (from the supply or a feed-through switch), neutral, ground, and a load wire that runs from the sensor out to the lamps.
The diagram below shows the wiring with a wall switch upstream of the sensor, which is a common configuration. The connection is very similar without the wall switch — just feed line and neutral straight from the supply into the sensor.
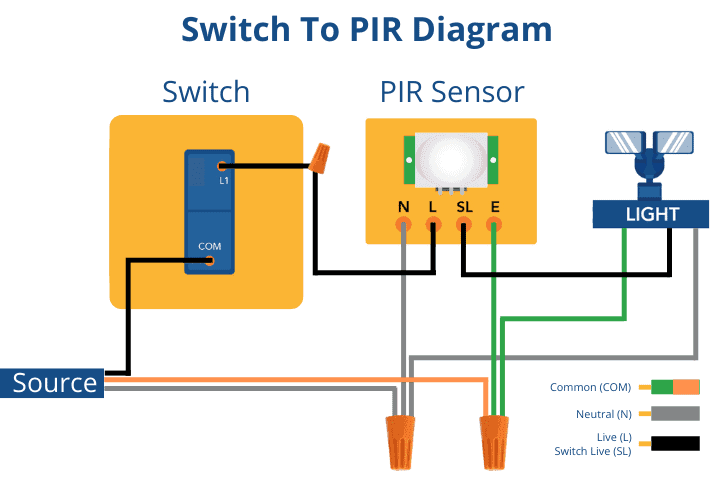
The wiring at the sensor itself is straightforward. Pulling the cable through finished walls and getting it into a weatherproof box at the right height is the part that's actually tricky.
Related: Does A Motion Sensor Light Need A Switch?
Mounting Height, Detection Cone, and the Three Dials
Wiring is half the job. The other half is putting the sensor where it can see what you want it to see, and adjusting the controls so it doesn't drive you crazy.
Mounting height and angle
Most residential PIR sensors have a horizontal field of view of 120°–180° and a vertical cone of 90°–100°, with an optimal mounting height around 6–10 feet. Mount too low and you get pets, blowing leaves, and false triggers; mount too high and a person walking head-on may be inside the dead spot directly below the lens. Aim the lens at the path you expect motion to cross, not at the spot you want lit — PIR sensors are far more sensitive to motion across the cone than motion straight toward it.
Sensitivity, time-on, and lux dials
Almost every hardwired PIR sensor has three small adjustment dials, usually under the lens or on the back. Set them once and your sensor will behave; ignore them and you'll either flood the yard all night or never see it trigger:
- Sensitivity (range): How far out the sensor reaches. Turn it down to ignore the sidewalk, up to catch the back fence.
- Time-on duration: How long the light stays on after the last detected motion — typically adjustable from about 10 seconds to 10–20 minutes.
- Lux / daylight lockout: How dark it has to be before the sensor will trigger at all. This is the photocell side of the device — set it for full dark unless you want the lamp coming on at dusk.
Final Words
Adding a motion sensor to an existing outdoor light is a real, reasonable DIY project — provided you're working on an existing fixture, you can shut off and verify the circuit, and you're using a sensor rated for the location and load.
Hire a licensed electrician if any of these apply: you'd be running new cable to a remote sensor location, your jurisdiction requires a permit and inspection for the work, the existing box has no neutral conductor, or you're not 100% sure how to test that a circuit is dead. The cost of a service call is small compared to the cost of guessing wrong on a live circuit.