
Can An Integrated LED Light Bulb Be Replaced?
When an integrated LED fixture dies, the LED chips are usually fine — it's the electrolytic capacitors in the driver that fail first, often years before the diodes would. That changes how you diagnose it.
 Eugen
EugenEugen Nikolajev
Creator of LED Lighting Info
Hi, I am Eugen. I was always one of those kids who had all sorts of weird lighting gadgets for every occasion.
Now, I want to share my knowledge and experience about lighting with you on LED Lighting Info.
Read my editorial standards
Key Takeaways
Technically it’s possible to replace a bulb in an integrated fixture, but it’s extremely difficult for the everyday person. They’re designed so that you replace the whole fixture when the light stops working, rather than swapping out a bulb.
Should I Repair My Integrated LED Fixture Or Replace It?
Answer a few questions about your dead or misbehaving integrated LED fixture and you'll get a clear next step — warranty claim, full replacement, driver swap, or a call to an electrician.
6 questions — takes about a minute
Answers are anonymous and may be used to improve content.
The rise of integrated LED fixtures through the early 2010s — alongside the phaseout of incandescent bulbs under the Energy Independence and Security Act of 2007, which began taking effect in 2012 — reshaped the lighting market.
No longer are consumers simply choosing between different types of bulbs. They now also have a choice between integrated and bulb-ready fixtures.
But when they stop working – which they will, ultimately – can you replace the light bulb inside? Or do you need to replace the whole fixture?
In this guide, I’m going to explain:
- What an integrated LED fixture actually is (and why the driver matters)
- Whether integrated LED light fixtures are replaceable
- How to change your integrated LED fixtures safely
- Integrated LED light fixtures vs. swappable bulb fixtures
What Does An Integrated LED Fixture Mean?
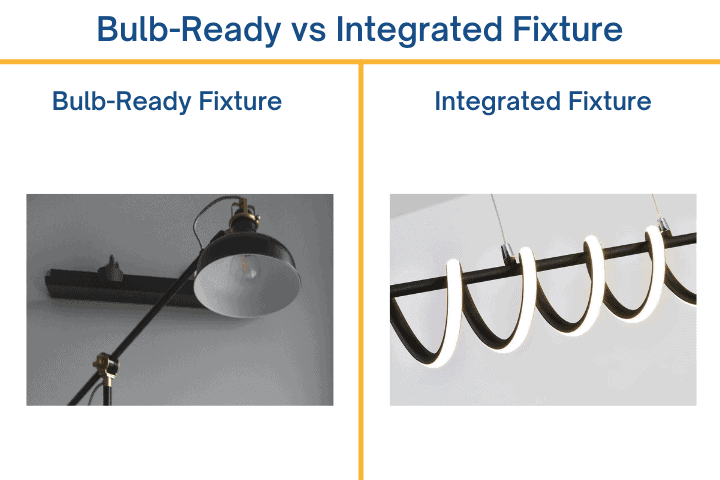
An integrated LED fixture is an all-in-one luminaire that contains the LED light source, driver, and heat sink built directly into the fitting. The driver is a small switched-mode power supply that converts mains AC into the low-voltage DC current LEDs actually need to run — you just don’t have to buy or wire it separately, because it’s sealed inside the fixture.
So you aren’t buying a separate fixture and then a bulb – the entire light is one purchase, and one installation.
Most quality integrated LED fixtures are rated for 25,000–50,000 hours of life. At roughly three hours of daily use, that works out to around 15–25 years before the fixture is likely to fail. When it does, you replace the whole unit rather than a bulb.
In the past, manufacturing bulbs and fixtures separately made sense because incandescent and halogen lamps burned out in well under a year. LEDs last long enough that it’s often more practical to engineer the LED, driver, and housing as a single, tuned system — which is why integrated fixtures have become so common in modern downlights, under-cabinet strips, and ceiling fans.
Are Integrated LED Lights Replaceable?
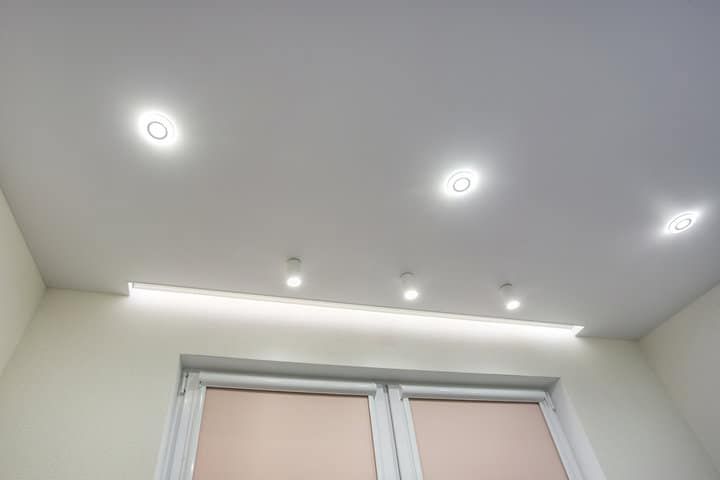
Integrated LED lights use LED modules mounted directly to the fixture’s circuit board instead of accepting a standard bulb. That construction makes it very difficult to swap out any individual light-emitting component. Instead, they’re designed so that, when they do eventually burn out, you replace the whole fixture.
Does this mean that an integrated LED has to be thrown away as soon as it stops working? No.
The first thing you should do is check your warranty. Manufacturers understand that LED bulbs are incredibly long-lasting, so they tend to offer a longer warranty period than with standard retrofit LEDs. In the US, Energy Star–certified integrated LED fixtures are required to carry at least a 5-year warranty, and many commercial-grade products go well beyond that.
If the warranty is still valid, the manufacturer should replace or repair the faulty fixture.
What Makes An Integrated LED Bulb Hard To Replace?
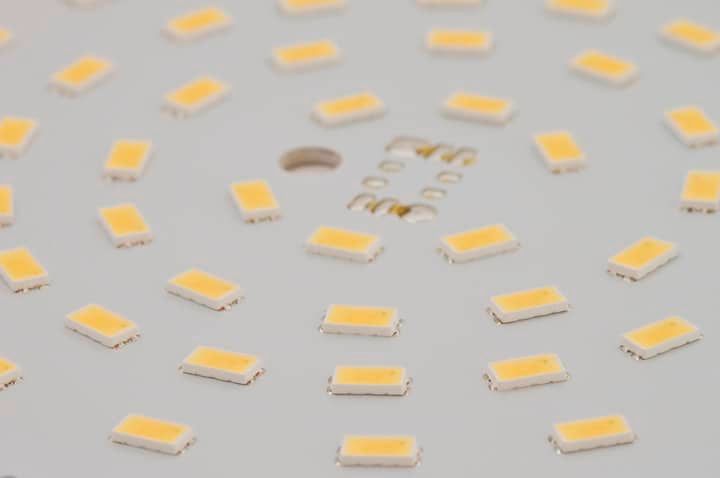
An integrated LED light fixture uses an LED array built into the fixture instead of a bulb. That array can take several forms — individual SMD (surface-mount) LEDs soldered to a PCB, or a COB (chip-on-board) module where many tiny diodes are encapsulated as a single component. COB modules in particular can’t be repaired by replacing individual diodes; the whole chip is a single unit.
Technically, if the fixture uses discrete SMD diodes and you can isolate a single burned-out one, you can open up the light, access the LED array, and (using a soldering iron) remove the faulty diode and replace it with a new one.
That’s only realistic if exactly one light on the PCB has failed. If the LED module has multiple defective LEDs, it’s usually better value to swap the entire fixture. It also wouldn’t make sense to buy a new LED array to install in the existing housing — you won’t save much money because the fixtures themselves aren’t expensive.
It’s also worth being honest about the skill involved: unless you’re comfortable working with small, intricate electrical circuit boards, soldering on a live LED module is how people turn a fixable light into a destroyed one. If you’re not already confident with a soldering iron, replace the fixture.
The Failure Is Usually The Driver, Not The LEDs
In most integrated fixtures that stop working, the LED chips themselves are fine. The dominant failure mode is the driver — specifically, the electrolytic capacitors inside its power supply, which degrade under thermal and electrical stress. Electrolytic capacitors typically have a lifespan three-to-four times shorter than the LEDs they power, and they degrade even faster inside hot or poorly ventilated enclosed fixtures.
This has a practical implication: soldering in a replacement diode usually won’t fix a dead fixture, because the diodes probably weren’t the cause in the first place. A full driver replacement is possible, but you have to identify the exact driver specs — input voltage, output voltage and current, and dimming protocol — and then disassemble the fixture to reach it. For most households, that’s why swapping the whole unit is the more practical answer.
This YouTube video may be useful for understanding how wired integrated LED light fixtures are put together:
How To Change Integrated LED Lights
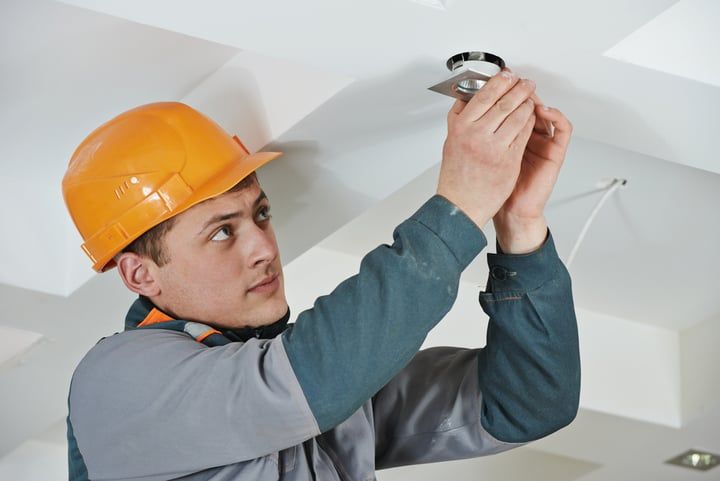
To swap out an integrated LED lighting fixture:
- Buy a replacement light – checking that it matches your existing one in size, cut-out hole, input voltage, beam angle, and (if applicable) dimmer protocol.
- Switch off the power at the breaker and confirm the circuit is de-energized with a non-contact voltage tester before you touch any wiring.
- Remove the existing integrated LED fixture and disconnect the wires.
- Connect the same wires to the new fixture, making sure live connects to live, neutral to neutral, and ground (earth) to ground.
- Restore power briefly to check the light works.
- Switch the power back off and install the fixture into its final position.
⚠️ Safety note: mains wiring work is regulated in many jurisdictions and may legally require a licensed electrician. Flipping the wall switch is not a substitute for turning off the breaker and testing the line — circuits aren’t always wired the way you expect. If you aren’t confident working with live cabling, hire a professional.
Before buying the replacement, also check its IP rating if the fixture sits anywhere damp or outdoors. Bathrooms near showers and tubs need at least IP44, and outdoor fixtures exposed to rain should carry IP65 or higher.
If the fixture will be controlled by a dimmer, confirm the new light is explicitly marked as dimmable and that your dimmer is rated for LED loads (and, ideally, listed on the fixture manufacturer’s compatibility chart). Pairing a modern LED with a legacy incandescent dimmer is one of the most common causes of flickering and premature driver failure.
The type of light will determine how to install it in place. Many integrated LED light fixtures are downlights, and because of their light weight, they just need to be pushed into place – they’ll usually have spring clips that hold them securely against the ceiling.
Generally, replacing integrated LED fixtures is straightforward – disconnect the wiring from the old light and wire it into the new light.
How To Replace Integrated LED Light In Ceiling Fan
Replacing integrated LED fixtures in a ceiling fan works exactly the same as replacing an LED fixture elsewhere. The only difference is sourcing the replacement light to fit your fan.
You need to:
- Check the ceiling fan manufacturer’s website to see if they sell replacement lights directly.
- If not, contact the manufacturer and ask for a compatible replacement light.
If you can source a light, the process to replace it is the same:
- Disconnect the power at the breaker and verify the circuit is dead.
- Remove the light fixture from the ceiling fan and disconnect the wires.
- Wire the new light into place, matching live-to-live, neutral-to-neutral, and ground-to-ground.
Unfortunately, if you can’t find a replacement light designed for your ceiling fan, you could try to find one that’s the exact right size. Otherwise, you may need to replace the entire ceiling fan.
Pros And Cons Of Integrated LED Fixtures

Integrated LEDs offer a number of advantages over using a retrofit bulb, but it’s not completely one-sided. There are some perks to sticking with replaceable-bulb fixtures too. Here’s how they compare on the factors that matter most in real installations:
| Factor | Integrated LED Fixtures | Replaceable Bulb Fixtures |
|---|---|---|
| Upfront cost | Higher | Lower |
| Long-term cost | Lower (no bulb replacements) | Higher |
| Repairability | Low — whole unit usually replaced | High — bulb or driver replaced individually |
| Design flexibility | High (slim, custom shapes) | Limited by bulb form |
| Driver failure impact | Replace full fixture | Replace bulb or driver only |
| Typical warranty | 5+ years (Energy Star minimum) | 1–3 years |
- Lower long-term cost — no replacement bulbs to buy for 15–25 years of typical use.
- Slim, modern form factors (thin downlights, linear strips, edge-lit panels) that replaceable-bulb fixtures can’t match.
- Driver, heat sink, and LEDs are tuned to work together, which generally improves efficiency, color consistency, and thermal management.
- Longer warranties — Energy Star certification requires at least 5 years, and many fixtures go further.
- Cleaner installation with fewer exposed bulb sockets and no bulb-shape mismatches.
- Higher upfront cost than a simple fixture-plus-bulb combination.
- Not user-repairable — when the driver or LED module fails, the usual fix is replacing the whole unit.
- Limited flexibility: you can’t easily change color temperature, beam angle, or wattage after installation.
- Harder to dispose of responsibly because the electronics are bonded to the fixture.
- Dimmer compatibility has to be checked per-fixture, not against a generic LED bulb spec.
FAQs
Is An Integrated LED Faulty When It Starts To Flicker?
A flickering integrated LED fixture could be a sign that it’s faulty, although the issue could also be with your power supply or controls. Common causes include:
- Overloaded circuit with too many lights
- An incompatible dimmer switch, or a non-dimmable fixture wired to a dimmer
- Damaged or loose wiring
- A failing driver inside the fixture — every integrated LED contains one, and driver issues can cause flicker in any line-voltage or low-voltage model
You can find much more information on flickering in my other post.
Can You Change The Bulb In An Integrated LED Downlight?
No — there isn’t a separable bulb to change. Replacing an integrated LED downlight means swapping the whole downlight unit. When you do, pay particular attention to four specs that vary widely between downlights: the ceiling cut-out diameter (commonly 55–110 mm / 2–4.5 in), the input voltage (120/240 V line-voltage vs. 12/24 V low-voltage with a separate transformer), the beam angle, and the dimmer protocol. A mismatch on any of these will either prevent a clean fit or cause flicker once it’s powered up.
Final Words
Integrated LEDs aren’t field-repairable the way a traditional bulb-and-fixture pairing is, but they’re also far more efficient than traditional light bulbs and retrofit lamps — capable of matching or exceeding incandescent brightness at a fraction of the wattage — which is why they’ve become the default choice for new downlights, under-cabinet strips, and many fan lights.
If a fixture stops working, don’t default to throwing it out. Work through it in this order:
- Check the warranty first — repair or replacement is often covered for 5+ years on certified fixtures.
- Diagnose the failure mode. Driver failures (especially capacitor degradation) are far more common than LED chip burnout, so dimming and flicker are usually electronics issues, not dead diodes.
- Weigh fixture age and replacement cost against the cost and difficulty of sourcing a matching driver or LED module.
- If repair isn’t practical, replace the whole fixture — and use the swap as an opportunity to verify IP rating, dimmer compatibility, and warranty on the new one.
For intermittent or flickering lights specifically, try troubleshooting your LED lights before assuming the fixture is finished.