
How To Wire Downlights To A Switch: Simple Diagram
A downlight wired with live and neutral swapped will still turn on and off — but the fitting stays at mains potential every time the switch reads off. That silent reversal is why a switched circuit can still kill you.
 Eugen
EugenEugen Nikolajev
Creator of LED Lighting Info
Hi, I am Eugen. I was always one of those kids who had all sorts of weird lighting gadgets for every occasion.
Now, I want to share my knowledge and experience about lighting with you on LED Lighting Info.
Read my editorial standards
Key Takeaways
Three conductors — live (brown), neutral (blue), and earth (green/yellow) — run between the consumer unit, the switch, and the fitting. Before touching anything, isolate the circuit at the consumer unit and verify it's dead with an approved voltage tester. Only then begin the work.
Wiring a downlight fixture to a light switch is not as hard as it may sound.
⚠️ Safety First: Isolate the Circuit
Before starting, switch off the relevant MCB (circuit breaker) at the consumer unit, or remove the fuse in older installations. Fuses blow when overloaded — they aren't "tripped." Circuit breakers are tripped. In modern UK homes you'll almost always be switching off an MCB.
Don't rely on the light switch itself to isolate the circuit. Use an approved voltage tester at both the switch and the fitting to confirm there's no voltage present before stripping wires or touching terminals. If you're not confident, hire a qualified electrician — under UK Part P, certain electrical work must be carried out or certified by a competent person.
Identifying the Wires
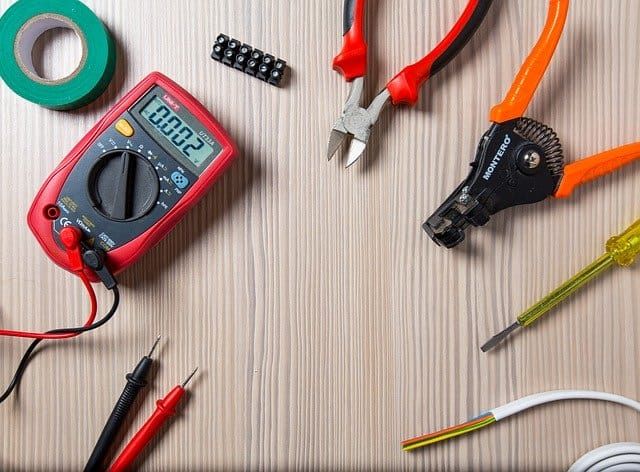
Three wires are used in most domestic lighting circuits: live, neutral, and earth. They are colour-coded so you can identify each without measuring potential differences. Under BS 7671 (the UK Wiring Regulations), the harmonised colours are:
- Live — brown
- Neutral — blue
- Earth — green/yellow striped (often bare copper with a green/yellow sleeve fitted at terminations)
You may still encounter red live and black neutral wires in older UK properties. Those were the standard before the 2004 harmonisation and were prohibited for new installations from April 2006. Any new work today must use brown for live, blue for neutral, and green/yellow for earth. If you find a mix of old and new colours on the same circuit, the installation has been modified — treat it with extra care and consider getting it inspected.
Types of Light Switches
Light switches are classified by how many locations can control the same light. UK terminology differs from US terminology — this article uses UK names throughout, with US equivalents noted.
1-way switch
A 1-way switch (SPST) has two terminals and simply makes or breaks the circuit. It controls the light from a single location — the most common type for bedrooms and single-entry rooms. In the US, this is called a single-pole switch.
2-way switch
A 2-way switch (SPDT) has three terminals: Common (C), L1, and L2. Two 2-way switches are wired together with two "traveller" wires, so flipping either switch changes which traveller carries the current and toggles the light. This is the standard arrangement for staircases and hallways with two entry points. In the US, this is called a 3-way switch.
Intermediate switch
An intermediate switch (DPDT crossover) is placed between two 2-way switches to control the same light from three or more locations. It has four terminals and swaps the two travellers as you flip it. In the US, this is called a 4-way switch. The names are different on each side of the Atlantic but the wiring principles are identical.
| UK term | US term | Locations | Typical use |
|---|---|---|---|
| 1-way (SPST) | Single-pole | 1 | Bedroom, single-entry room |
| 2-way (SPDT) | 3-way | 2 | Hallway, staircase |
| Intermediate (DPDT) | 4-way | 3 or more | Long corridor, open-plan area |
How to Wire Downlights to a Switch
The diagram below shows a basic 1-way switch controlling a downlight. Brown is the live (and switched live), blue is the neutral, and green/yellow is the earth.
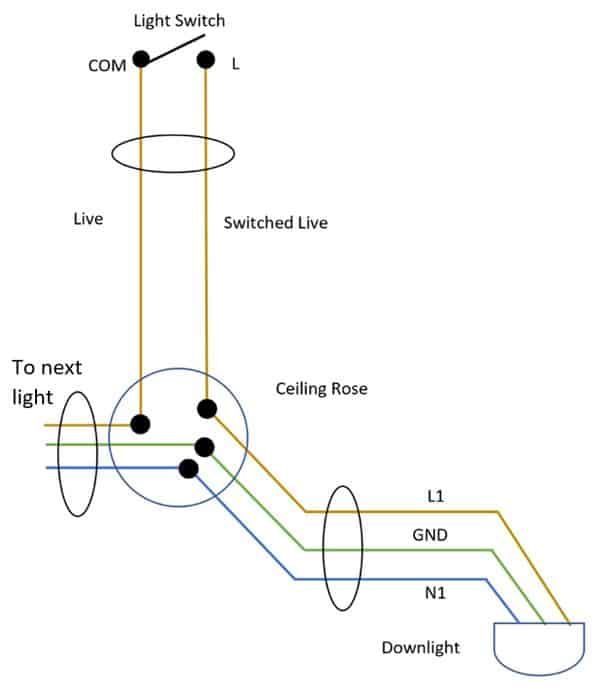
Before you start, confirm the ceiling cut-out is the right size for the fitting, the circuit is isolated, and your cable rating is adequate for the total number of downlights on the circuit. Then work through the steps:
- At the switch, connect the incoming live (brown) to the Common (C) terminal and the switched live going to the light to L1. Join the neutrals (blue) in a connector block — a standard switch doesn't terminate neutral unless it's a smart or neutral-fed dimmer.
- At each downlight, strip roughly 10mm of insulation from each core. Insert the brown (switched live) into the L terminal, the blue into the N terminal, and the green/yellow into the earth terminal. Tighten each terminal screw firmly and tug each wire to confirm it's held securely.
- Wire the downlights in parallel — live-to-live, neutral-to-neutral, earth-to-earth — so each fitting receives full mains voltage. Use screwless connector blocks (Wago-style) or a loop-in ceiling rose for joints. Twisted wires under insulation tape are not acceptable.
- Tuck the wiring neatly into the back box or ceiling void, avoiding sharp bends. Mount each downlight into its cut-out with the supplied spring clips.
- Re-energise the circuit at the consumer unit and test operation. If any fitting fails to light, isolate again and check the terminal connections before re-testing.
How many downlights on one circuit?
Count the total lamp load. A typical UK 6A lighting circuit can carry up to 1,380W (6A × 230V), but good practice limits a circuit to around 1,000–1,200W to leave headroom. LED downlights usually draw 4–10W each, so you can run 50 or more on a single 6A circuit without trouble. For older halogen downlights (35–50W each), the limit drops to roughly 20–25 fittings. Always check the lamp wattage and cable rating before designing a long run.
Fire-rated fittings and ceiling integrity
If the downlights are going into a ceiling that forms a fire barrier — e.g., between floors in a house or flat, or between a habitable room and a loft — you must use fire-rated downlights. These carry an intumescent pad or hood that expands under heat to restore the ceiling's fire resistance. Non-fire-rated fittings in such a ceiling turn every cut-out into a path for smoke and flames. Also look for airtight IP-rated fittings in bathrooms and insulated ceilings to limit condensation and comply with Part L energy regulations.
Wiring Downlights on a Dimmer
If you're remodelling, it's worth considering whether to install a dimmer switch instead of a plain on/off switch. For a basic trailing-edge dimmer replacing an existing single-gang switch, the wiring is often similar to a standard 1-way installation.
However, most modern LED-compatible dimmers — and virtually all smart dimmers — require a neutral wire at the switch box. Without a neutral, the dimmer has to trickle a small current through the LED driver to power itself, which can cause visible flicker and "ghosting" where the LEDs don't fully turn off. Many older UK homes don't have a neutral run to the switch position, so check the dimmer's installation guide before buying. Lutron, for example, explicitly recommends neutral-based dimmers for LED loads.
LED dimmer compatibility
Not every dimmer works with every LED. Dimmable LED downlights need a matched dimmer — otherwise you get flicker, buzzing, a narrow dimming range, or premature driver failure. Three things to check:
- Trailing-edge vs leading-edge: LEDs generally prefer trailing-edge (reverse phase) dimmers. Leading-edge dimmers were designed for incandescent and halogen loads and often misbehave with LED drivers.
- Minimum load: most dimmers specify a minimum wattage. A single 6W LED downlight on a dimmer with a 40W minimum will flicker. Check the dimmer's LED-rated minimum, which is usually lower than its incandescent rating.
- Manufacturer compatibility list: every reputable dimmer brand publishes a chart of tested LED products. When in doubt, pick a lamp and dimmer from the same brand's tested pair.
Energy savings
Dimmers cut lighting energy use roughly in proportion to brightness. The U.S. Department of Energy estimates that smart dimmers with scheduling can deliver whole-home lighting savings of up to 30%. Dimming an LED to around 50% brightness reduces its power draw by roughly 40% — LEDs aren't perfectly linear because driver efficiency drops slightly at low output, but the saving is still substantial over a year of use. The older 10%-savings figure comes from incandescents at slight dimming, where most of the wattage still went to heat.
Lamp life
Dimming significantly extends the life of incandescent and halogen bulbs by reducing filament stress and heat. LEDs already run cool and have long rated lives, so the lifespan benefit is smaller — but running a matched LED on a compatible dimmer keeps the driver within its intended operating range. The opposite is also true: an incompatible dimmer can shorten LED life through flicker stress and over-current, so don't assume dimming is automatically gentler.
Common Wiring Mistakes
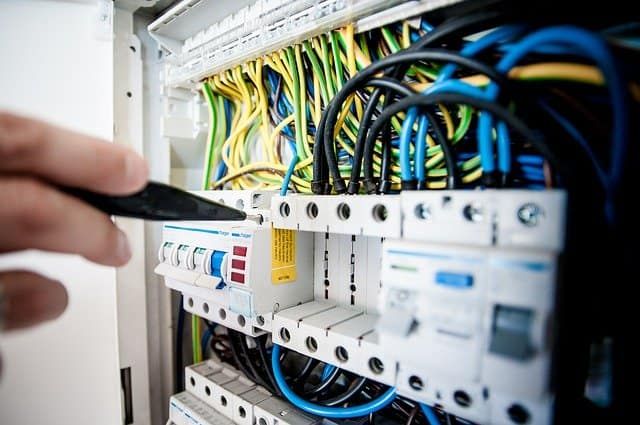
A handful of wiring errors come up repeatedly. Some cause the light to simply not work; others create real danger. Here's what each error produces and how serious it is:
| Wiring error | What happens | Safety risk |
|---|---|---|
| Live connected to earth terminal | Fixture not earthed; live metal parts | Severe shock risk, fault current to earth |
| Crossed live and neutral elsewhere in circuit | Short circuit; MCB trips or fuse blows | Fire if protection fails to operate |
| Switch on neutral instead of live | Light turns on/off normally, but the holder stays at mains voltage when "off" | Shock when changing a bulb or servicing the fitting |
| Loose terminal screw | Intermittent operation, flicker, heat build-up | Arcing and potential fire over time |
| Common not on the Common terminal (2-way wiring) | Light doesn't work from both switches | Low — wiring fault, not a hazard |
The most dangerous error is swapping live and neutral so the switch interrupts the neutral conductor. The light still turns on and off — the circuit is still being broken — but the bulb holder and the fitting remain at mains potential even when the switch is in the "off" position. Anyone replacing a lamp or working on the fitting is exposed to live voltage. This is why both BS 7671 in the UK and NEC 404.2(B) in the US require the switch to always be on the line (live) conductor, never the neutral.
A full live-to-neutral or live-to-earth short will pop the MCB immediately in most cases. The rare, dangerous failure mode is a high-resistance fault that doesn't trip protection but generates enough heat to start a fire — which is why loose terminals and poorly made joints are more hazardous than they look.
Before any DIY electrical project, check that the work won't void your home insurance if it isn't carried out or certified by a qualified electrician.
Final Words
Wiring a downlight to a switch comes down to three things: identify the live, neutral, and earth correctly; terminate them firmly into the right terminals at both ends; and isolate the circuit before you work. Pair your downlights with a matched, neutral-fed dimmer if you want control, use fire-rated fittings in any ceiling that forms a fire barrier, and size the circuit for the total lamp load.
If anything in the existing installation looks non-standard — mixed wire colours, no earth at the switch, no neutral at the switch, or unknown cable sizes — stop and bring in a qualified electrician. Lighting circuits are forgiving most of the time, and unforgiving in exactly the cases you can't see coming.
FAQ
Do I need a neutral wire at the switch for LED downlights?
Usually yes, if you want to use a modern LED-compatible dimmer or any smart switch. Standard on/off switches only need the live and switched live, but most LED-rated dimmers and smart dimmers require a neutral to power themselves cleanly — without one, they can cause flicker or ghosting on the LEDs. Many UK homes built before the mid-1980s don't have a neutral at the switch position, so check the back box before buying.
How many LED downlights can I run on one switch?
A typical UK 6A lighting circuit can safely carry around 1,000–1,200W of load, with a theoretical maximum of 1,380W. LED downlights draw 4–10W each, so 50 or more is usually fine on a single 6A circuit. The practical limit is more often the breaker rating and the total cable run than the switch itself.
What's the difference between a UK 2-way switch and a US 3-way switch?
Nothing — they're the same device with different names. A UK 2-way switch and a US 3-way switch are both SPDT switches with three terminals (Common, L1, L2), used in pairs to control one light from two locations. Similarly, a UK intermediate switch and a US 4-way switch are the same crossover device. The wiring principles are identical; only the naming convention differs.
Can I use the same switch for regular and LED downlights?
For a non-dimming circuit, yes — a standard switch simply opens and closes the live conductor, so the lamp technology doesn't matter. For a dimming circuit, no — you need an LED-compatible (usually trailing-edge) dimmer and LEDs marked as dimmable. Mixing an old incandescent dimmer with modern LEDs is the single most common cause of flicker complaints.
Do downlights need to be fire-rated?
Yes, whenever they're being installed in a ceiling that forms part of a fire barrier — typically between floors in a house or flat, or between a habitable room and a loft space. Fire-rated downlights have an intumescent pad or hood that expands under heat to seal the hole. Non-fire-rated fittings in such a ceiling turn every cut-out into a path for smoke and flames during a fire.