
Can LED Headlights Be Installed Upside Down?
At 60 mph, being dazzled by oncoming headlights means traveling 440 feet effectively blind — and an upside-down LED low beam can cause exactly that glare without you ever touching the brights.
 Eugen
EugenEugen Nikolajev
Creator of LED Lighting Info
Hi, I am Eugen. I was always one of those kids who had all sorts of weird lighting gadgets for every occasion.
Now, I want to share my knowledge and experience about lighting with you on LED Lighting Info.
Read my editorial standards
Key Takeaways
It is possible to install LED headlights upside down, but this will make them dangerous – they'll throw glare at other drivers or send the beam in the wrong direction. Ensure the diodes are horizontal and the shield, if the bulb has one, is at the bottom.
Replacing a headlight in most cars is a pretty straightforward process and one you can usually do yourself without the help of a mechanic.
LED orientation is especially critical. Unlike a halogen — where a filament sits inside a symmetric glass envelope — LED diodes are mounted on two opposite sides of the bulb, and the headlight reflector or projector is engineered around their exact position. Install the bulb upside down and you break the entire optical system.
In this article I'm going to cover:
- Why installing LED headlights upside down is dangerous
- How to tell whether your headlights are upside down
- The correct orientation for the diodes, shield, and alignment marks
Why Installing LED Headlights Upside Down Is Dangerous
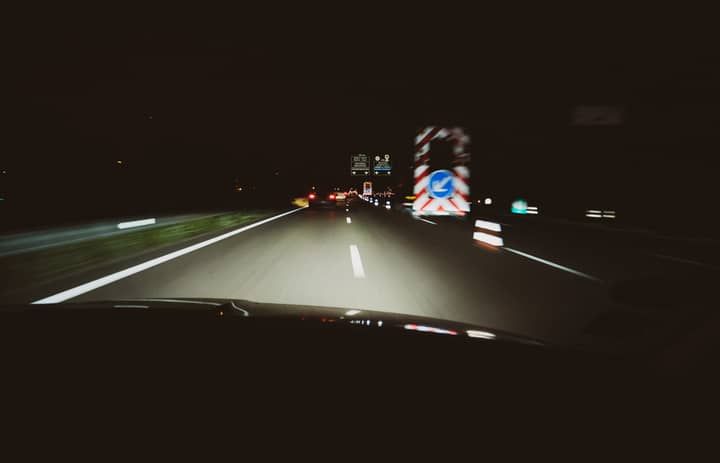
LED headlights run on low-voltage 12V DC and stay cooler to the touch than halogens, so there's little risk of shock or burns during installation. Electrical safety isn't the problem here.
The real hazard is optical. Installing an LED bulb upside down changes the headlight's beam pattern — and the beam pattern is what keeps you in your lane, out of the trees, and out of other drivers' eyes.
The bulb itself doesn't get brighter when it's upside down — the diodes emit the same amount of light regardless of orientation. What changes is the beam shape. Instead of a clean cutoff, the light scatters off parts of the reflector housing that aren't designed to focus it (often the chrome above the low-beam reflector), producing an uncontrolled beam that throws glare at oncoming drivers even though the lumen output is unchanged.
That glare is a real safety issue. According to a 2025 RAC survey, drivers say it can take up to five seconds to recover from being dazzled by oncoming headlights. At 60 mph that's roughly 134 meters (440 feet) traveled while effectively blind.
In most US states, the law says you can't use high beams within 500 feet of an oncoming vehicle, or within 300 feet of a vehicle you're following (since they can dazzle a driver through the rear-view mirror). An upside-down low beam effectively acts like a high beam with no cutoff — which can put you in violation of those rules without you ever touching the brights switch.
Even if you don't end up dazzling anyone, you'll be able to tell the beam isn't right. It might point too low, directly in front of the car, or up into the sky rather than straight ahead. Either way, you lose the usable road illumination you need in darkness or poor weather.
Orientation matters more with LEDs than it did with halogens because there's more light at stake. A quality LED replacement puts out roughly 3,000–6,000 lumens per bulb compared with 700–1,200 for a standard halogen. Misdirected light is far more disruptive when there's more of it to misdirect.
| Bulb type | Typical lumen output (per bulb) |
|---|---|
| Standard halogen | 700–1,200 lm |
| Quality LED replacement | 3,000–6,000 lm |
One important caveat on that brightness: a brighter source isn't always better road illumination. IIHS and Consumer Reports testing has found that many aftermarket LED retrofits in reflector housings appear brighter at the source but actually put less usable light on the road than the halogens they replaced, because the beam pattern is broken. Orientation is the first thing to get right, but housing type matters too — more on that below.
How to Tell Whether Your Headlights Are Upside Down
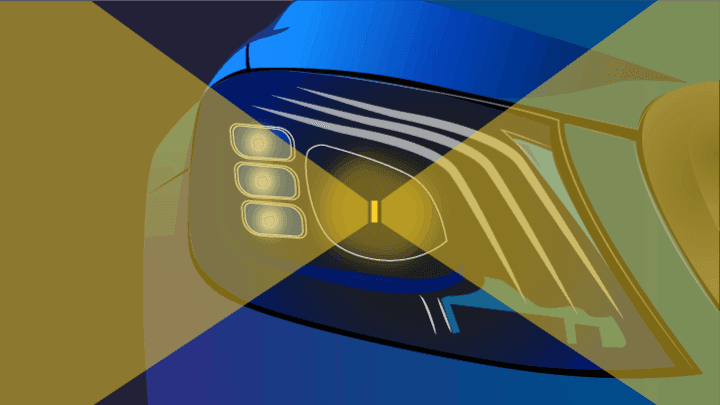
Two checks will tell you almost immediately whether your bulbs are installed the right way round. You can pull the bulb out and inspect its orientation directly (covered in the next section), or run an aiming test against a wall.
The Wall Test
You'll need a flat wall with at least 25 feet of clear space in front of it — the inside of a garage works well.
- Drive close to the wall, pointing straight at it, and mark the center of each headlight on the wall with chalk or tape.
- Draw or tape a horizontal line connecting the two marks — this is your reference line.
- Reverse the car so it's exactly 25 feet (7.6 m) from the wall, still pointing straight at it.
- Switch on your low beams.
- Look at where the top of each beam's bright area (the cutoff) lands. For a properly aimed low beam, the cutoff should fall about 2 inches below the reference line — that's the SAE aiming target at 25 feet.
- If the pattern is off by a few inches, tweak the adjusters on the headlight housing (check your owner's manual). If the beams are off by a foot or more, or pointing well above the line, the bulbs are almost certainly upside down and need to be re-installed.
Some newer vehicles — especially European models — have automatic headlight leveling systems that adjust vertical aim based on vehicle load. Those systems won't compensate for a bulb installed incorrectly; they only move the housing, not the bulb inside it. Orientation errors have to be fixed at the bulb itself.
If you don't have access to a wall or don't feel confident pulling the bulb yourself, take the car to a mechanic. They can use a beam-setter tool to verify alignment and rotate your bulbs if needed. This will come at an additional cost — but professional headlight aiming is required by law during vehicle inspection in many jurisdictions, so it's worth doing after any bulb swap regardless.
The Correct Orientation for LED Headlight Diodes
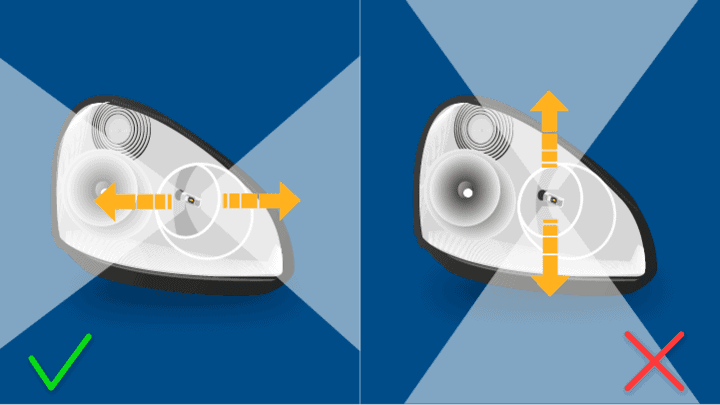
The other way to check that your headlights are installed correctly is to remove the bulb and look at it directly.
A headlight doesn't simply project light forwards. Inside the housing there's a set of angled reflector surfaces — or, in a projector headlight, a lens and shield assembly — that focus the beam into a specific pattern with a sharp cutoff along the top. If the light source isn't sitting exactly where those optics expect it, the beam falls apart: weak in some spots, glaring in others, aimed in the wrong direction.
Quick Orientation Checklist
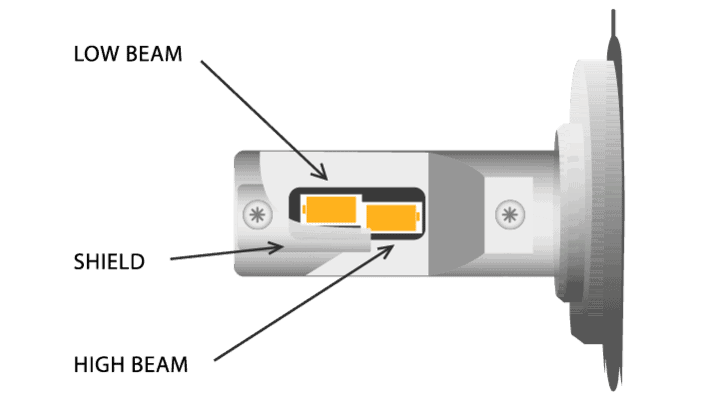
- Diodes horizontal — at the 3 o'clock and 9 o'clock positions when you look at the bulb end-on.
- Shield at the bottom — the small fin or plate on the bulb body faces down.
- Dual-beam bulbs — the upper diode should sit on the top side of the bulb.
- Alignment marks — follow any arrows, tabs, or printed lines on the heatsink.
Diodes at 3 and 9 O'Clock
LED headlights carry diodes on two opposite sides of the bulb. When the bulb is installed in the headlight, those diodes should sit horizontally — at the 3 o'clock and 9 o'clock positions. That's the arrangement the reflector was designed around.
Most quality LED bulbs include alignment lines, tabs, or arrows on the heatsink to make this obvious during install. If you see those marks, follow them.
Dual-Beam vs Single-Beam Bulbs
Some bulbs — called dual-beam bulbs, with sizes like H4/9003, H13, 9004, and 9007 — handle both low and high beam in a single unit. In LED form, this is often achieved by stacking two sets of diodes on each side, with one slightly above the other. If your bulb is dual-beam, the upper diode should be on the top side of the bulb when installed.
Not sure which bulb type you have? Look at the printing on the old bulb or check the owner's manual. Common single-beam sizes include H7, H11, 9005, and 9006; common dual-beam sizes include H4/9003, H13, and 9007.
What About the Shield?
Most LED bulbs include a small shield that helps direct the light correctly; it should sit at the bottom of the bulb once installed. Halogens generally don't have one — single-beam halogens (H7, H11, H1, 9005, 9006) rely on the housing itself for the cutoff. The main exception is dual-filament halogens like H4/9003, which carry a small internal cap between the two filaments to shape the low-beam cutoff.
Reflector vs Projector Housings
Orientation matters much more in reflector headlights than in projector headlights. Many aftermarket LED bulbs aren't recommended for reflector housings at all, because the emitter shape and position can't perfectly mimic a halogen filament even when oriented correctly — which is why some LED retrofits in reflectors have tested worse than the halogens they replaced. If you have projector headlights, the lens and shield control the beam regardless, so alignment errors are less punishing (but still worth getting right).
Before You Start
One safety note: disconnect the negative terminal of the car battery before pulling the bulb, and give the housing a few minutes to cool if the lights have been on. LEDs themselves run cool, but the housing and surrounding components can still be hot after extended use.
Final Words
It's surprisingly easy to install LED headlights the wrong way round if you're not paying attention — but a five-minute check is all it takes to avoid it. Your headlights should never be misaligned or throwing glare, for your own safety and that of everyone else on the road.
A quick recap before you drive off:
- Check that the diodes sit horizontally (3 and 9 o'clock), with any shield at the bottom — and on a dual-beam bulb, the upper diode up top.
- Run the wall test at 25 feet. The low-beam cutoff should fall about 2 inches below your headlight center line.
- If anything looks off — or if you've swapped LEDs into a reflector housing — have a mechanic verify the aim with a beam setter before relying on them at night.
Have you made the switch to LEDs, and if so, how easy did you find it to swap the bulbs? Have you ever used the wall test to check your headlight alignment? Let me know in the comments, and I'll be happy to help you if you want to know more.
FAQ
Will installing an LED bulb upside down damage the bulb?
Usually not. Most LED headlight bulbs are electrically fine in any orientation, but the heatsink and fan are designed around a specific install position, so the bulb may run hotter than intended and have a shorter life. More importantly, the beam pattern will be broken. The fix is simple: rotate the bulb to the correct position.
Do I need to re-aim the headlights after installing LED bulbs?
Yes, even when the bulbs are oriented correctly. LED emitters sit at a slightly different position than halogen filaments, so the factory aim may no longer be accurate. Run the wall test after install and tweak the vertical adjusters if the cutoff isn't where it should be.
Are aftermarket LED replacement bulbs legal in the US?
It's a gray area. DOT/SAE compliance is the standard, and many retrofit LED bulbs aren't formally certified for on-road use even though they're sold freely. Check your state's vehicle code; some jurisdictions will fail a vehicle inspection if the beam pattern doesn't meet the required cutoff.
My bulb doesn't have a visible shield — is that a problem?
Not necessarily. Some LED designs use the heatsink geometry itself to block stray light rather than a separate shield. As long as the diodes sit horizontally at 3 and 9 o'clock and any alignment marks on the heatsink are pointing the right way, you're fine.
Can I install LED bulbs in a reflector housing?
You can, but many aftermarket LED bulbs aren't recommended for reflector housings because the emitter position doesn't perfectly match a halogen filament, and the resulting beam can be less focused than the halogen it replaced. Projector housings handle LED retrofits much more forgivingly. If you're in doubt, look for bulbs specifically marketed for reflector use and verify the beam pattern with the wall test after install.