
How To Install LED Strip Lights On The Ceiling
Switching to 24V at purchase time cuts resistive loss to roughly a quarter — the real reason long ceiling runs go dim at the far end even with a correctly sized power supply.
 Eugen
EugenEugen Nikolajev
Creator of LED Lighting Info
Hi, I am Eugen. I was always one of those kids who had all sorts of weird lighting gadgets for every occasion.
Now, I want to share my knowledge and experience about lighting with you on LED Lighting Info.
Read my editorial standards
Key Takeaways
To install LED strip lights along your ceiling, measure the room's perimeter, choose between a direct ceiling mount or a hidden placement behind coving or in an aluminum channel, size a power supply to handle the total wattage with ~20% headroom, and plan how to route the cable back to an outlet. For any run longer than about 5 metres, pick 24V strips over 12V to avoid visible voltage drop.
A well-installed LED strip along the ceiling creates a soft, indirect glow that makes the whole room feel taller and more finished. The same strip, applied carelessly, looks like a line of exposed wiring with bright dots visible from across the room. The difference is almost entirely about planning — where you hide the strip, what channel you mount it in, and whether the power supply can actually drive the full run.
In this article, I'm going to cover:
- How to decide between ceiling and wall placement
- How to size the power supply and pick 12V vs 24V
- A step-by-step guide to installing LED strip lights on the ceiling
- How to run strip lights around ceiling corners without breaking them
- How to install LED strip lighting in a false (suspended) ceiling
- How to hide the strip, cables, and power source
Before You Start: Ceiling or Wall?
The single biggest decision happens before you measure anything: will the strip sit directly on the ceiling, or tucked behind coving, crown molding, or an aluminum channel on the upper wall? The answer depends on what's already in the room and whether you want to see the strip or hide it.
If you want to hide the LEDs and wiring, install the strip on the upper wall, behind coving or crown molding, or inside an aluminum channel. For most setups, you want the light facing out into the room or upward — so attach the strip to the upper edge of the coving, or to the wall just below the crown. Stick the strip directly to the ceiling and it shines straight down with the strip itself fully visible. That's fine if you like the look, but it's rarely the most flattering result.
| Situation | Recommended placement |
|---|---|
| You have coving or crown molding | Inside the coving, or on the upper wall behind the molding |
| No coving, visible strip is acceptable | Direct ceiling mount with adhesive |
| You want an upward ambient wash on the ceiling | Upper wall or top of coving, facing up |
| You want downward task lighting | Direct ceiling mount, facing down |
| Ceiling surface is textured, porous, or uneven | Aluminum LED channel mounted to a smooth wall section |
| High-output strip (14 W/m or above) | Aluminum LED channel with heat-dissipating fins |
Power Supply, Voltage, and Run Length
12V vs 24V — why it matters
Voltage drop — where the strip gets visibly dimmer the further it runs from the power supply — is caused by resistance in the strip's copper traces. A long continuous run appears brighter near the feed and darker at the far end. Daisy-chaining reels end-to-end just extends the trace length, so "chaining on more strips" isn't wiring them in series the way a physics textbook would — the drop comes from the copper, not the topology.
The fix most people don't realise they have is picking 24V instead of 12V at purchase time. A 24V strip draws roughly half the current for the same power, which translates to about a quarter of the resistive loss along the strip. For any ceiling run over 5 metres, 24V is almost always the right buying decision.
As a rule of thumb, don't run 12V strips longer than 5m continuous, or 24V strips longer than about 10m. Beyond that, feed power from both ends of the run (a "dual feed"), or inject power mid-run from the same supply.
Sizing the power supply
Multiply the strip's watts-per-metre rating by the total length of your run, then pick a power supply rated at least 20% above that total. An undersized PSU runs hot, buzzes, and fails early — the extra headroom is cheap insurance.
Example: a 5 m run of 14.4 W/m strip draws 72W at full brightness. Size the PSU at ≥ 86 W — a stock 100 W unit is fine.
Electrical safety
Low-voltage DC between the power supply and the strip is safe for DIY. Anything on the mains side — running cable inside walls, tapping into a junction box, hardwiring a transformer into a ceiling cavity — should be done by a licensed electrician and must comply with local wiring standards (NEC in the US, BS 7671 in the UK). If the install means cutting into walls or ceilings, bring in a pro.
Step-by-step Installation Guide
Before you stick anything down, plug in the full reel and confirm every section lights up. Returning a dead strip is much easier before it's on the ceiling than after.
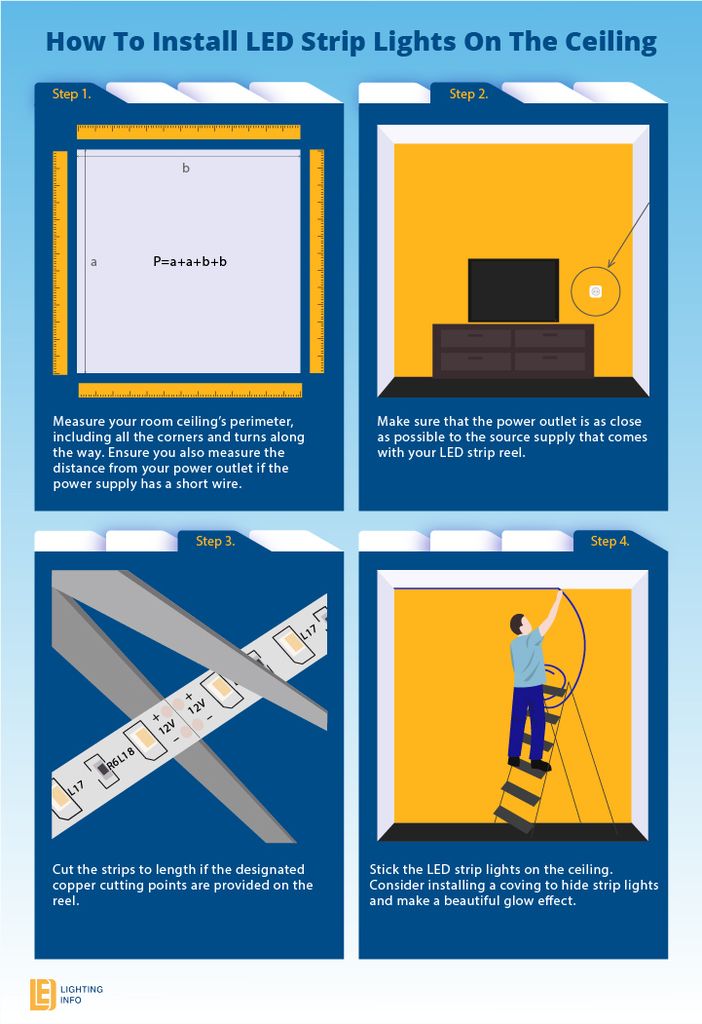
- Measure the perimeter of the ceiling, including every corner and turn. For a rectangular room, that's 2 × length + 2 × width. Add roughly 10% extra for corners, cuts, and mistakes.
- Measure the distance from the nearest power outlet to where the strip will start. Power-supply cables are usually short, so plan to start the strip close to the outlet — otherwise you'll need an extension lead that has to be hidden too.
- Decide on length. LED strips come in specific reel lengths, so work out whether you need one reel or several. You can cut the strip to length at the marked copper pads — cut only at those points, never between them.
- Plan for heat dissipation. Aluminum dissipates heat well; wood and drywall don't (wood's thermal conductivity is ~0.12 W/m·K vs aluminum's ~205 W/m·K). Higher-output strips, roughly 14 W/m and above, should always mount to an aluminum LED channel to avoid premature lumen depreciation. Lower-output strips under about 10 W/m are usually fine on drywall. See our guide on whether LED strip lights need a heat sink for details. Either way, keep the strip out of unventilated spaces behind heavy furniture or curtains so the LEDs last their rated lifetime.
- Stick the strip in place. Good strips come with a 3M-style adhesive backing — peel and press firmly. Peel only 3–5 inches of backing at a time; more than that and the strip will start sticking to your arm, the wall, or itself while you try to position it.
- If the ceiling is textured or porous, or the factory adhesive feels weak, add external double-sided mounting tape or a stronger wall adhesive. Premium strips sometimes include thermal-transfer adhesive that also helps carry heat away — the best of both worlds.
- If the run falls short, leave the gap at the end and order a matching reel to splice in — don't try to stretch the existing strip. Strips from different batches can vary slightly in colour temperature, so buy from the same manufacturer and bin if possible.
Running Strips Around Ceiling Corners
There are three ways to get a strip around a corner, in order of neatness:
- Cut the strip at a copper pad and rejoin with an L-shaped corner connector or soldered wire. Cleanest finish, most work.
- Loop the strip back on itself in a gentle curve that doubles past the corner. If the corner is hidden by coving, the extra loop won't be visible and the bend stays well within the strip's limits.
- Bend the strip laterally — flat, in the same plane as the PCB — around the corner. Most strips accept a lateral bend down to about a 1-inch radius without damage.
One critical rule on bending: LED strips can only flex laterally, in the same plane as the PCB. They cannot be folded vertically, out of that plane — doing so cracks the PCB and breaks the copper traces, and the damage is usually permanent. For a 90° out-of-plane turn (ceiling to wall, for example), always cut at a copper pad and use a connector. Don't try to fold.
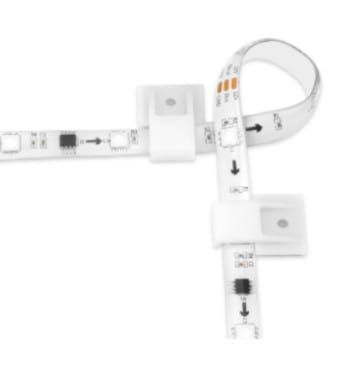
Make the decision based on how visible the corner will be. For hidden corners in coving, the loop-back method is simplest. For exposed corners, cut and use a connector for a neat finish.
Installing LED Strip Lights in a False Ceiling
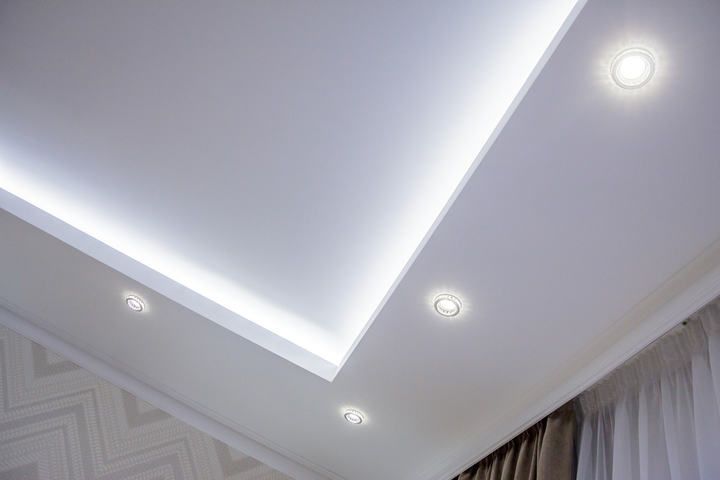
A false ceiling (also called a suspended or drop ceiling) is a secondary ceiling hung below the structural one, usually on a metal frame. This is architecturally distinct from a ceiling cove — a cove is a decorative ledge around the perimeter, while a false ceiling is a whole second surface. False ceilings are excellent for strip lights because the gap between the two ceilings is a natural hiding place for the strip and its cabling.
The two specific challenges are power routing and strip orientation.
Routing the power cable
False ceilings are typically central, so you need to run the strip's cable out of the ceiling cavity, across the structural ceiling, and down a wall to an outlet. Some false ceilings extend to the wall, which makes this easy. If yours doesn't, either cover the cable with a surface-mounted trunking, or — for a cleaner result — run it through the structural ceiling and into the wall cavity. That last option is real construction work and should be done by someone who knows what they're doing.
Strip orientation
You have two options: mount the strip vertically on the frame holding the ceiling up, or mount it horizontally facing upward into the gap.
Vertical mounting on a gapped frame is harder because adhesive tape has no continuous surface to grip — you may need wide staples or a stronger glue. Horizontal mounting looks cleaner but the strip needs a lip to hide behind; without one, the LEDs and reflected dots of light will be visible on the frame above. Place the strip as close to the lip as possible.
One benefit of a false ceiling is that the runs are usually shorter, so you're less likely to hit voltage drop — the resistance of the strip's copper traces means a long continuous run appears dimmer at the far end than near the power supply.
Where to Place LED Strips on a Ceiling
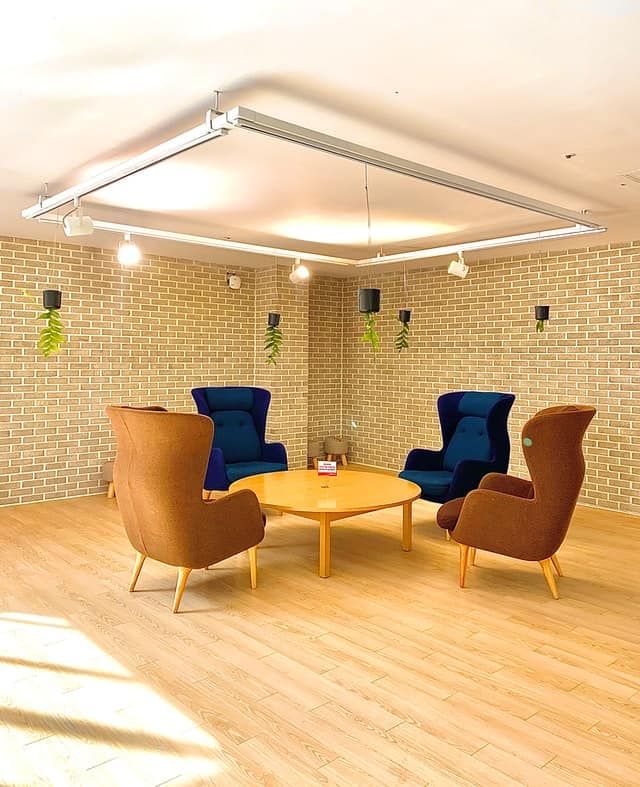
Strip location depends on two things: where the power outlet is, and how you want the light to fall on the room.
The outlet determines where the run starts. The wire from the outlet to the power supply should be discreet — behind furniture, along a corner, or tucked under a cable concealer cover.
Once the strip is wired and working, the next question is how the light should be distributed. As a starting point, strips 3–5 inches below the ceiling tend to wash more of the ceiling with light, while strips roughly a foot below favour the wall. These are rough guides, not rules — the ideal distance depends on the strip's beam angle (commonly 120°, sometimes 140°), LED density, ceiling height, and how reflective the ceiling finish is. Industry cove-lighting references recommend a minimum cove depth of around 150 mm (≈6 in), with 200–250 mm (8–10 in) for professional results, and keeping the strip 30–45 mm back from the lip so the LEDs aren't directly visible. Plan to experiment before committing to adhesive.
Some ceilings have a built-in cove recess that acts as a natural hiding place for exposed LED strips — take advantage of it if you have one.
How to Hide the LED Strip on the Ceiling
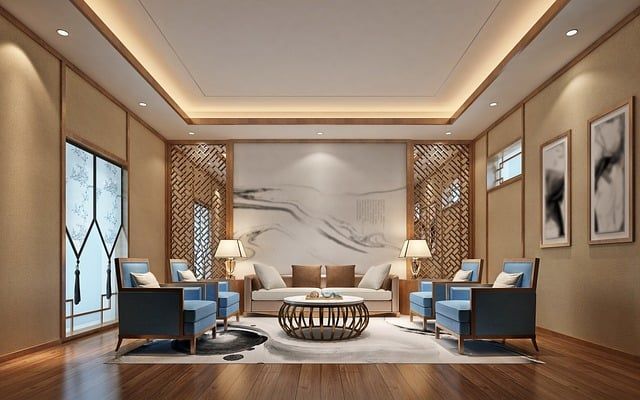
The easiest hiding place is whatever recess or coving you already have. If you don't have one, install new coving — or better, mount the strip inside a purpose-built aluminum LED channel.
A purpose-built aluminum LED profile is an extrusion specifically designed for strip mounting. It has a channel sized to fit the strip, a diffuser that clips over the top to soften the light, and (on better profiles) cooling fins that genuinely dissipate heat. Those profiles extend the strip's lifespan by keeping the LEDs cooler. Thin decorative aluminum trim — sometimes sold as "aluminum coving" — looks similar but has very little thermal mass and no fins, so it provides only marginal heat-sink benefit. If you want the strip to actually run cooler, look for a profile marketed specifically as an LED heat-sink channel, not just decorative aluminum trim.
Hiding also matters when the strip is off. An unpowered strip is a visible line of dotted LEDs, solder points, and printed text — not a great look during the day. Exposed strips also cause glare and afterimages when they're on, which is another reason a diffused channel or coving is preferable to a direct mount.
Flexible LED profiles are the other common hiding option. They house the strip completely and diffuse the output into a soft glow. Floor-rated profiles exist too — those let you walk over the strip without damaging it, useful for stair nosings or low-level lighting.
Hiding the Power Cord and Connectors
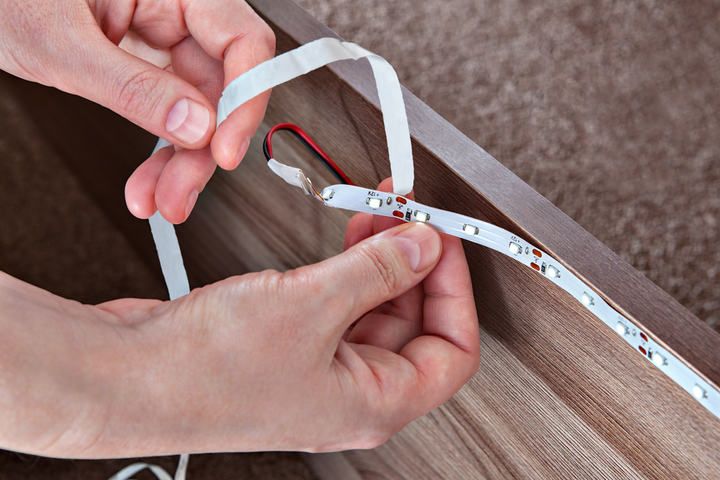
The easiest option is a cord cover (Amazon) — a slim plastic channel that sticks or screws to the wall and takes the cable inside. They come in various finishes, and most can be painted to match the wall. Keep some leftover paint from your last room touch-up and the cover will almost disappear.
A box-style cover is usually better than flat tape-on covers — cables can slip out from under tape during installation, and the box is more forgiving. Screw-mount the cover if you want a permanent result; otherwise the double-sided tape on the back is fine.
If you buy an aluminum channel for the strip itself, the connectors between strip segments sit inside the channel and stay hidden without extra work.
For a fully invisible result, run the cable through the wall and exit at the outlet via a cable faceplate (Amazon). This is a proper cable-management job and should be done by someone who's done it before — it means cutting into drywall and knowing what's behind it.
Can LED Strip Lights Be Installed Without Coving?
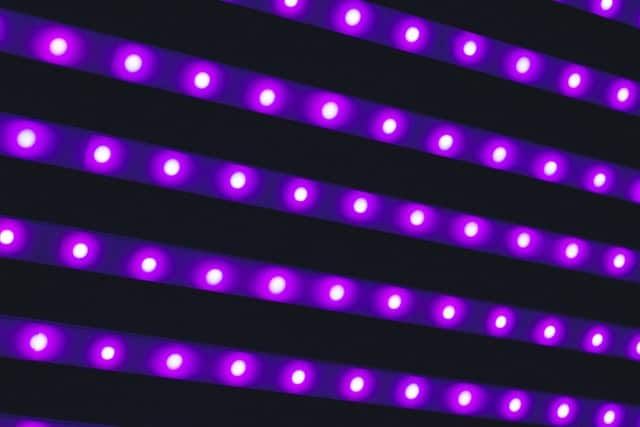
Yes. A direct adhesive mount works perfectly well — it's the budget option, and plenty of people prefer the look of an unhidden strip. The reason to use coving or a channel is aesthetic: it reduces glare, hides the strip when it's off, and softens the light into an indirect glow.
Dimming and smart controllers
If glare is your main concern and you don't want to add coving, fit a compatible LED dimmer. Not every dimmer plays nicely with LEDs — make sure it's rated for LED loads. If you're using a WiFi or Zigbee smart controller, dimming typically happens through the controller itself (PWM on the DC side), not through a wall dimmer on the mains side. RGB and RGBW strips especially should be dimmed and colour-controlled through their dedicated controller, not with an external dimmer, or you'll end up with flicker, colour shifts, or both.
Don't let the lack of coving stop you from starting — any LED strip lighting is better than none, and you can always upgrade to a channel, coving, or smart controller later.
Final Words
The install itself is easy — measure, cut at the copper pads, stick, plug in. The parts that go wrong go wrong because of planning, not technique: picking 12V for a run that's too long, mounting a high-wattage strip to bare drywall, skipping the channel and ending up with a line of visible dots, or trying to fold the strip vertically at a corner and cracking the PCB.
Get the planning right and the rest takes an afternoon.
If you're weighing up ceiling against wall placement, also check our guide on installing LED strips on a wall.
FAQ
How do I calculate the total length of LED strip I need?
Add up the length of each wall or edge the strip will run along. For a rectangular room, that's 2 × length + 2 × width. Add about 10% extra to cover corners, cuts, and mistakes.
How do I size the power supply for an LED strip?
Multiply the strip's watts-per-metre rating by the total length in metres, then choose a PSU rated at least 20% above that total. Example: a 5 m run of 14.4 W/m strip draws 72 W, so size the PSU at ≥ 86 W — a stock 100 W unit is fine. An undersized supply runs hot, buzzes, and fails early.
Should I use 12V or 24V strip for a ceiling installation?
For runs longer than about 5 metres, choose 24V. 12V strips show visible voltage drop — dimming at the far end of the run — past that length because of resistance in the strip's copper traces. A 24V strip draws roughly half the current for the same power, so it suffers about a quarter of the resistive loss and stays bright further along the run.
Why shouldn't I mount high-output LED strips on wood or drywall?
Wood has very low thermal conductivity (~0.12 W/m·K vs aluminum's ~205 W/m·K), so it acts as an insulator rather than a heat sink. Low-output strips under about 10 W/m are usually fine on drywall, but higher-output strips (14 W/m and above) should always mount to an aluminum LED channel designed for heat dissipation, or they'll suffer premature lumen depreciation and early failure.
Can I bend an LED strip around a corner?
You can bend it laterally — flat, in the same plane as the PCB — down to about a 1-inch radius without damage. You cannot fold it vertically, out of that plane, without cracking the PCB and breaking the copper traces. For out-of-plane 90° turns (ceiling to wall, for example), always cut the strip at a copper pad and rejoin with an L-connector or soldered wire.
How long can a single continuous LED strip run be?
Most 12V strips cap at around 5 m in a single continuous run before voltage drop becomes visible. Most 24V strips cap around 10 m. Beyond those limits, feed power from both ends of the run (dual feed) or inject power mid-run from the same supply.
Does aluminum coving really act as a heat sink?
Only if it's a purpose-built aluminum LED profile with sufficient thermal mass and, ideally, cooling fins — those extrusions are engineered for thermal transfer. Thin decorative aluminum trim looks similar but has very little mass and provides only marginal cooling. For any high-output strip, choose a channel marketed specifically as an LED heat sink.