
Everything You Need To Know About LED Strip Lights: Definitive Guide
RGB strips blend 16 million colors but can't produce a clean white — that approximate warm glow is exactly why RGBW strips exist.
 Eugen
EugenEugen Nikolajev
Creator of LED Lighting Info
Hi, I am Eugen. I was always one of those kids who had all sorts of weird lighting gadgets for every occasion.
Now, I want to share my knowledge and experience about lighting with you on LED Lighting Info.
Read my editorial standards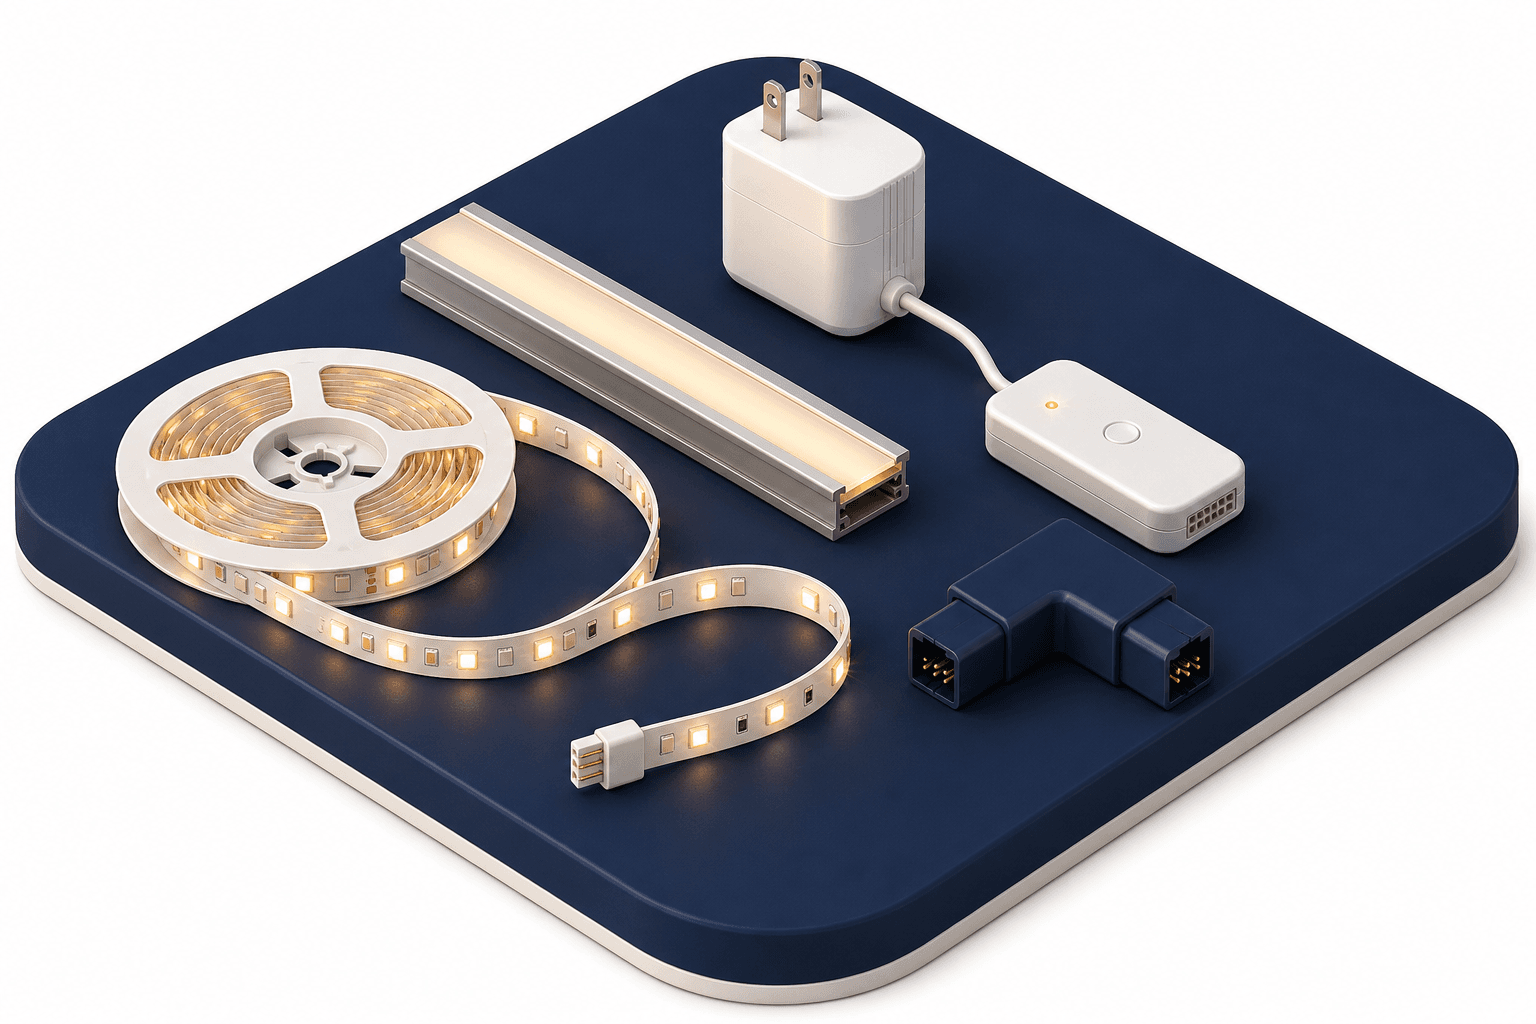
LED strip lights give you more installation options than almost any other lighting type. They can be attached to irregular surfaces, cut to length, and configured for everything from task lighting to mood ambiance, accent lighting in alcoves, or color-changing effects behind a TV.
There's a lot to know when you're first buying LED strip lights. This guide covers the main decisions:
- What kinds of LED strip lights you can buy
- How bright they need to be (and what brightness ranges suit which jobs)
- Voltage options, power supplies, and dimmers
- IP ratings and outdoor use
- Smart and addressable strips
- How to install your LED strip lights
Different Types Of LED Strips
There isn't just one kind of LED strip light. Several form factors exist, and the right one depends on whether the strip will be visible, where it's installed, and the look you want.
Strip vs Rope vs Flex Strip Light
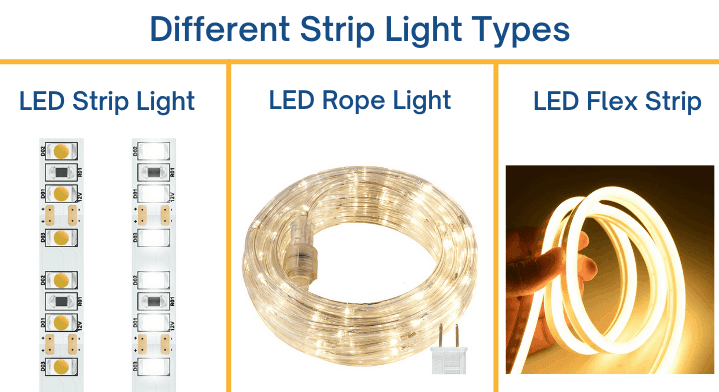
A standard LED strip has adhesive on one side and exposed components — LEDs, resistors, copper pads — on the other. It's designed to stick to a flat (but bendable) surface. The components are visible when the strip is off, so it works best where it won't be seen during the day: coving, alcoves, under cabinets, behind a TV.
Rope lights are different. They're not adhesive — instead, the LEDs are encased in a flexible tube that can be wrapped around furniture, tied into a tree, or hung along a wall. Rope lights are bulky and meant to be visible, so they suit decorative jobs more than subtle accent work.
Flex strip lights sit between the two. They stick down like a standard strip but are fully enclosed in a silicone or plastic sleeve, so the individual LEDs aren't visible — you see one continuous line of light. If you need a strip that stays presentable when switched off, a flex strip is the best choice.
White Vs RGB Strip Lights
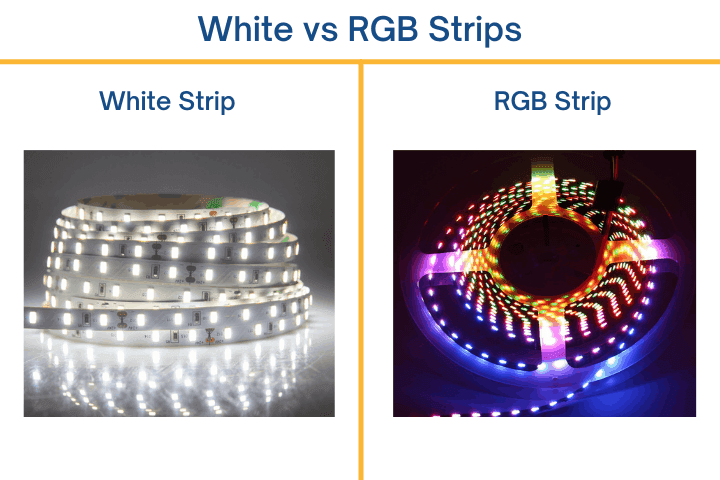
Once you've picked a form factor, the next decision is color. The two main families are white and RGB.
White LED strips come in different shades of white. The Kelvin (K) rating on the box tells you how warm or cool the light is. Lower numbers are warmer (closer to orange); higher numbers are cooler (closer to blue).
- Warm white — roughly 2700K–3000K. Cozy, bedrooms, living rooms.
- Neutral / cool white — roughly 4000K–5000K. Kitchens, garages, work surfaces.
- Daylight — 5000K–6500K. Task lighting, workshops, retail displays.
Two strips rated at the same Kelvin temperature won't always look identical. Cheaper strips drift from their advertised rating and shift in color over time. Look for tight color-binning specs (often labelled "MacAdam ellipse" tolerance) on quality strips.
RGB LED strips use chips with three dies — red, green, and blue — and mix them to produce different colors. With a standard 8-bit-per-channel controller, the theoretical maximum is 16,777,216 shades; the actual usable range depends on the quality of the controller's PWM resolution, but for any practical purpose it's far more than the human eye can distinguish.
RGB strips can't produce a true clean white — combining red, green, and blue at full brightness only approximates white. If white is the primary use, a dedicated white strip will look better. RGBW strips add a fourth white die specifically to fix this.
RGB strips are useful for mood, color-changing accents, and supplemental light for growing plants. Some smart strips can also sync color with what's on your TV for movie nights.
How Bright Should Your LED Strip Be?
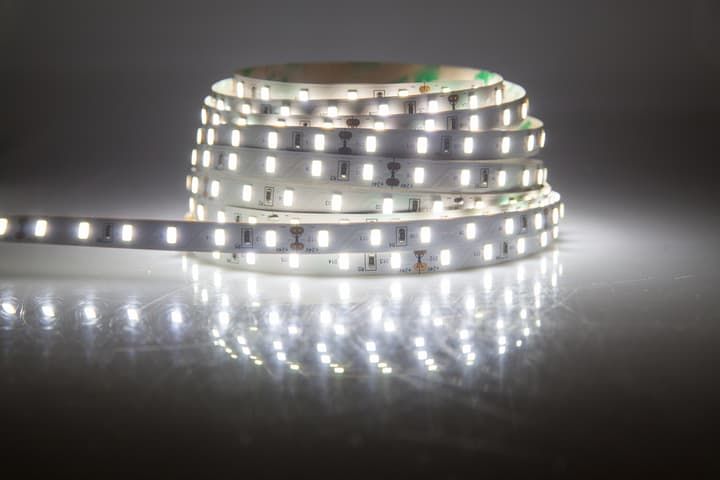
LED strip brightness is measured in lumens per meter (lm/m) or lumens per foot. A single LED's brightness is irrelevant on its own — what matters is how much light the strip puts out per unit of length. Quote the lm/m figure when comparing strips, not the total lumens of a 5 m reel.
Brightness needs vary by application:
- Accent / decorative — ~150–300 lm/m. Behind a TV, inside cabinets, indirect cove lighting.
- Ambient / general — ~500–1000 lm/m. Hallway runs, room perimeter lighting, soft ceiling washes.
- Task lighting — ~1000–1500+ lm/m. Under-cabinet kitchen lighting, vanities, work surfaces.
- High-output / commercial — 1500+ lm/m. Retail displays, signage, large architectural runs.
Brightness and quality are separate dimensions. A high lumen-per-meter rating doesn't make a strip well-built — color consistency, CRI, and longevity matter just as much. A 1500 lm/m strip from a no-name brand can still look worse than a 600 lm/m strip from a quality manufacturer.
Color Rendering Index (CRI)
CRI measures how accurately a light source renders colors compared to natural daylight, on a scale of 0–100. Most cheap LED strips fall around CRI 70–80, which is fine for accent lighting but makes skin tones look pale and food look off.
For under-cabinet kitchen lighting, vanity lighting, or anywhere color accuracy matters, look for CRI 90 or higher. Premium strips advertise CRI 95+ and often specify R9 (the deep-red sample), which is the value most cheap LEDs fail at.
LED Density And Chip Size
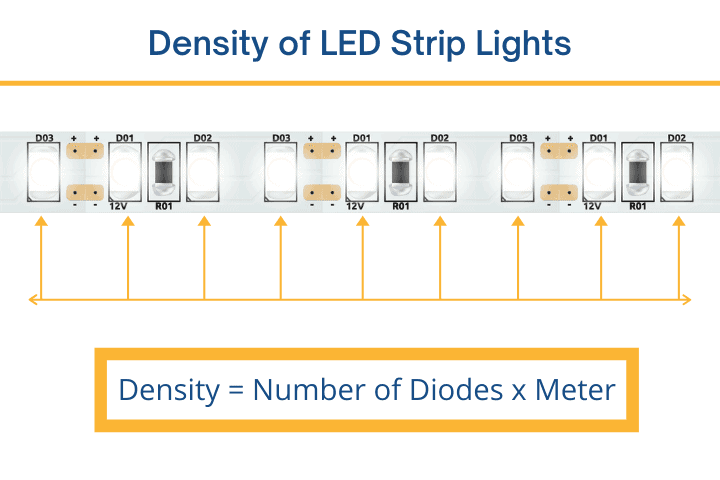
LED density — the number of LEDs per meter — affects both brightness and how uniform the light looks. A standard strip has 30 LEDs/m. Higher-density strips run 60, 120, or up to 350 LEDs/m. Lower density tends to look spotty (bright next to each LED, dim between); higher density gives a smoother continuous line of light, especially when paired with a diffuser.
Chip size matters too. LED strips are advertised with a four-digit code — the most common are 3528, 5050, and 2835. The numbers describe the chip's footprint in tenths of a millimeter (e.g., 3528 = 3.5 × 2.8 mm).
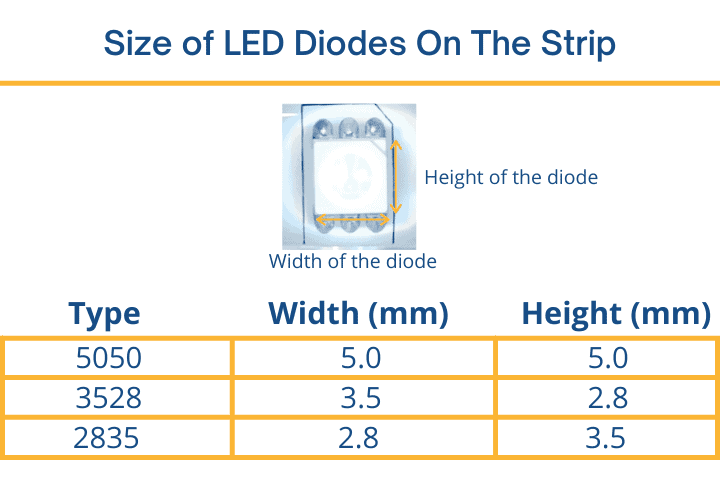
| Spec | SMD 3528 | SMD 2835 | SMD 5050 |
|---|---|---|---|
| Dimensions | 3.5 × 2.8 mm | 2.8 × 3.5 mm | 5.0 × 5.0 mm |
| Dies per chip | 1 | 1 | 3 (R, G, B) |
| Typical flux per chip | ~5–8 lm | ~12 to 100+ lm (drive-current dependent) | ~15–22 lm per die |
| Best for | Low-power accent / decorative | Efficient white lighting | RGB color mixing |
| Built-in heat sink | No | Yes | No |
| Light-emitting area | Small, circular | Large, near-full surface | Large, three-die package |
A few things worth knowing about how those chips compare in practice:
- 3528 is the older, lower-power option. A higher-density 3528 strip can match a lower-density 5050 in brightness while drawing less power.
- 5050 packs three dies per chip, which is why it's the standard choice for RGB and RGBW strips.
- 2835 is newer and more efficient. The chip footprint is rotated relative to 3528, which lets it fit a larger, brighter die. The light-emitting area covers nearly the whole chip surface (versus a small circle on 3528), and the package has a built-in heat sink that lets it run harder without losing efficiency.
More efficient, brighter chips and higher density also mean more power draw. A 60 W power supply might run a 5 m high-density strip but power 10 m of a low-density low-power strip — so always size the supply to the strip you're actually buying.
Voltage And Power Supply
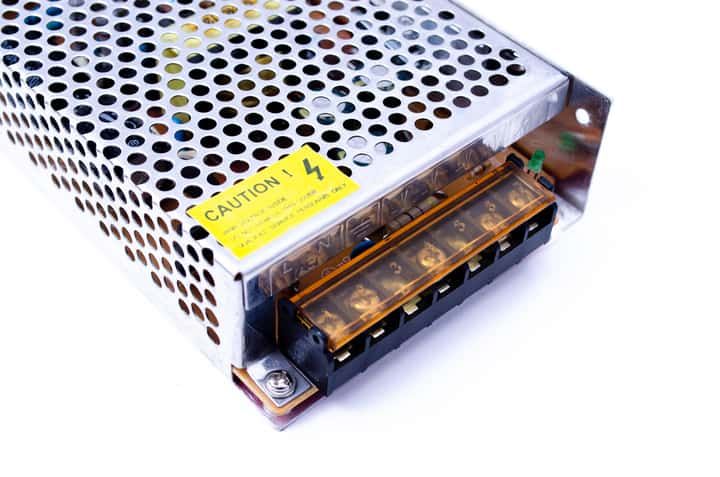
Two things to get right when picking a power supply: voltage and wattage.
Strip Voltages
Most consumer LED strips are 12V or 24V DC, but other voltages exist:
- 5V DC — addressable strips (WS2812B, WS2811, SK6812) and USB-powered strips. Very common for TV backlighting.
- 12V DC — the most common consumer option. Single-color, RGB, RGBW. Cuts every ~3 LEDs (~5 cm), so good for tight bends and short runs.
- 24V DC — better for longer runs because of less voltage drop. Cuts every ~6 LEDs (~10 cm).
- 36V / 48V DC — long architectural and commercial runs.
- 120V / 220V AC — mains-voltage "driverless" strips, used for very long single feeds (150 ft+) in commercial installs. Wiring these is a job for an electrician.
Always check the strip's rated input voltage before buying a supply. A 12V supply won't turn on a 24V strip; a 24V supply paired with a 12V strip will overdrive it.
Safety: Plugging a 12V strip into a 24V supply will overdrive the LEDs. They can get hot enough to smoke, damage the strip, and in worst cases ignite nearby materials. Always match strip voltage to supply voltage.
Sizing The Power Supply
Check the strip's wattage per meter (or per foot). Multiply by the length you're actually using, then add 20% headroom so you're not running the supply at 100%.
Example: a 4.8 W/m strip cut to 2 m draws ~10 W. Add 20% headroom — you need a 12 W supply or larger. A standard 36 W supply gives plenty of room and lets you extend the strip later. If you add a connector and another few meters, recheck the math before reusing the same supply.
Connecting Strips To The Power Source
LED strips terminate in one of three ways — a DC barrel receptacle, open wires, or bare copper pads. Power supplies terminate in either a DC plug or open wires. The right adapter depends on which combination you have:
- DC receptacle on strip + DC plug on supply — plug them together. Done.
- DC receptacle on strip + open wires on supply — use a male DC pigtail adapter. Screw or clamp the supply wires into the adapter, then plug it into the strip.
- Open wires on strip + DC plug on supply — use a female DC pigtail adapter; wire the strip into the adapter.
- Open wires on both sides — use a wire connector or solder them together, watching polarity (red to +, black to −).
- Bare copper pads on strip — clip on a solderless connector, then run that to whichever supply termination you have. Or solder wires straight to the pads.
Related: Can LED Strip Lights Be Battery Powered?
Smart And Addressable LED Strips
Standard RGB strips set every LED on the strip to the same color at once. Addressable strips give you per-pixel control — every individual LED can be a different color, allowing animations, gradients, chasing effects, and color sync with media.
Common addressable chip families:
- WS2812B — 5V, single data line, the most popular hobbyist option. Used in WLED setups.
- WS2811 — 12V variant, controls LEDs in groups of three. Used in longer commercial pixel runs.
- SK6812 — similar to WS2812B but with an added white channel (RGBW). Better for accurate whites.
- APA102 / SK9822 — clocked SPI strips. More precise PWM and faster refresh, useful for camera-on-set lighting and persistence-of-vision projects.
Smart-home integrated strips (Philips Hue, LIFX, Govee) use the same underlying tech but bundle a controller and bridge for app, voice, and Zigbee/Wi-Fi control. DIY builders often pair raw addressable strips with an ESP32 running WLED for the same capability at a fraction of the cost.
Important difference: addressable strips are not dimmed via the power supply. Brightness is set in the data signal by the controller or firmware. A standard PWM dimmer plugged in line will not work.
Dimmers And Controllers
Most standard single-color and analog RGB DC strips are dimmed using PWM (pulse-width modulation) — the controller switches the strip on and off thousands of times per second, and the duty cycle sets the perceived brightness. PWM dimmers come as in-line controllers, wall-mounted dimmers, RF remotes, or smart Wi-Fi/Zigbee controllers.
A few rules of thumb:
- DC strips need a DC PWM dimmer wired between the supply and the strip — not a wall dimmer wired before the supply, which will damage most LED drivers.
- AC mains-voltage strips need a TRIAC or ELV dimmer rated specifically for that strip. Check the manufacturer's compatibility list.
- Addressable strips are dimmed in firmware (WLED, ESPHome, Hue app), not by an in-line dimmer.
- If you'll see the strip on camera (TV, recording, video calls), choose a controller with a high PWM frequency (≥ 1 kHz) to avoid visible flicker.
Smart-home compatibility splits along protocol lines. Wi-Fi controllers are easiest to set up but add network traffic; Zigbee and Z-Wave are more reliable for many devices but need a hub; Matter is consolidating both. Check that any controller you buy explicitly lists support for your platform (Home Assistant, Apple Home, Alexa, Google Home).
IP Ratings And Outdoor Use
An IP (Ingress Protection) rating tells you how well a strip resists dust and water. The two digits represent dust and water resistance respectively — higher is better.
- IP20 — bare strip, no protection. Indoor dry locations only.
- IP65 — strip is coated in silicone. Splash and spray resistant. Suitable for bathrooms (away from direct shower spray) and covered outdoor areas.
- IP67 — fully encased. Survives temporary immersion. Suitable for direct rain and outdoor exposure.
- IP68 — rated for continuous submersion. Suitable for pools, fountains, and underwater installs.
Two extra things to watch for outdoor: the cut ends and connectors are not waterproof even on an IP67 strip — seal them with shrink tubing or silicone. And the power supply needs its own outdoor-rated enclosure or a Class 2 outdoor driver; a regular indoor brick will fail outside.
How To Install LED Strip Lights: Step By Step
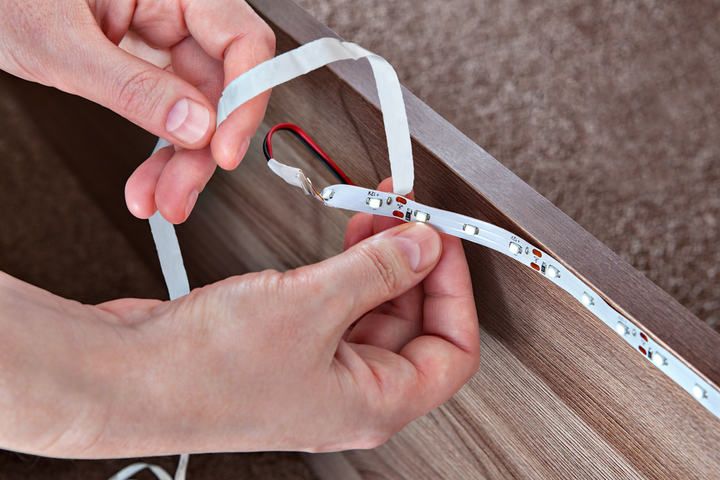
Once the strip, supply, and any controllers are picked, installing the strip is straightforward.
- Measure first. Use a tape measure for the exact length you need — don't guess. Add a few centimeters to land at a cut line.
- Unspool and trim. Cut the strip along a cutting line (marked with a scissor icon) before installing — it's easier on a flat surface.
- Clean and dry the surface. Wipe with isopropyl alcohol and let it dry fully. Any dust, oil, or moisture will weaken the adhesive bond.
- Peel and stick in sections. Remove the adhesive backing a section at a time, pressing the strip down as you go. Don't peel the whole length at once — it gets unwieldy and tends to stick to itself or the wrong surface. Watch for kinks and air bubbles.
- Connect and power on. Connect the strip to the supply, double-check polarity, and switch on. The strip should light evenly along its length.
- Pair the controller. If using a remote or app, pair it now to confirm color and dimming work.
If the strip doesn't have its own adhesive, use double-sided foam tape designed for LED strips. Apply tape to the surface first, then press the strip onto the tape.
Aluminum Channels And Diffusers
Aluminum channels (also called LED profiles or extrusions) are nearly mandatory for a clean professional finish, and they do two jobs at once. The aluminum acts as a heat sink that pulls heat away from the strip, extending its lifespan. The opal or frosted diffuser cover hides the individual LED hot-spots and turns the strip into a smooth continuous line of light.
Channel profiles to choose from:
- Surface-mount — sits on top of any flat surface. Easiest to install, most flexible.
- Recessed — sinks flush into a routed groove in cabinetry or drywall. Cleanest finish but requires woodworking.
- Corner / angled — installs at 30°, 45°, or 60° in inside corners. Standard for under-cabinet kitchen lighting.
Working Out Strip Length For A Room
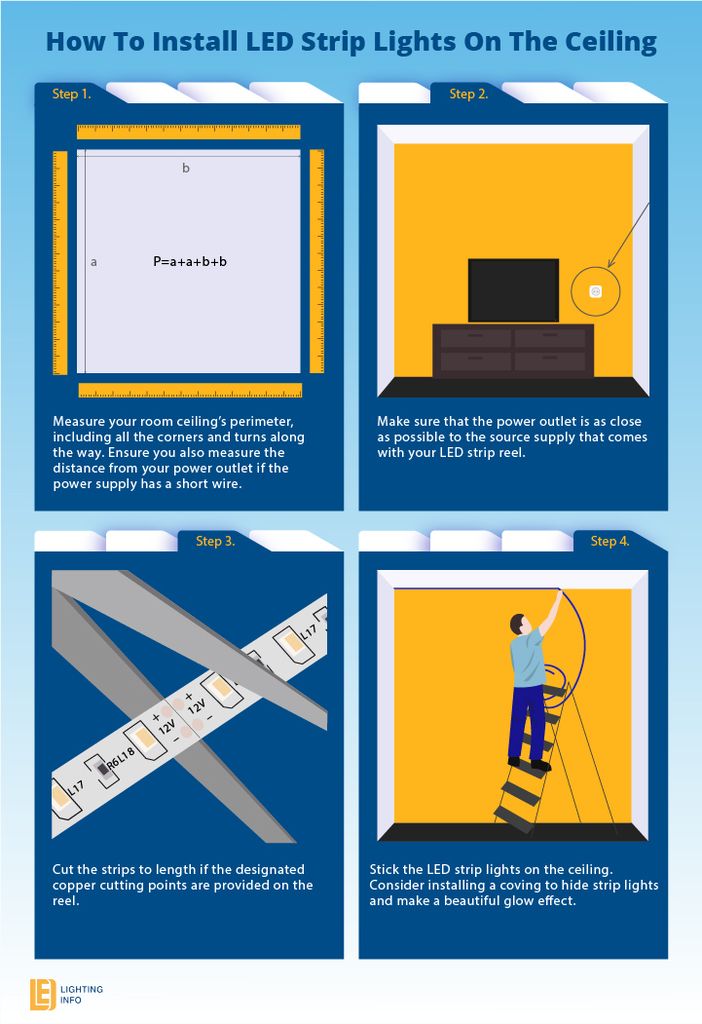
For a perimeter run around a ceiling, use the perimeter formula P = 2(a + b), where a is the room length and b is the width. For L-shaped or alcoved rooms, measure each side separately and total them. Add a small buffer (5–10%) for cuts, alignment with channel sections, and the gap to the power supply.
Things To Watch When Installing
- Outlet placement. End the strip as close to the outlet as possible to keep the power cable hidden.
- Wood and other heat-sensitive surfaces. Mount the strip in an aluminum channel rather than directly on bare wood. Heat builds up under the strip and can scorch the substrate over time.
- Surface texture. Adhesive doesn't bond well to textured paint, embossed wallpaper, or porous brick. Mount a smooth backing strip first, or use channels.
- Wallpaper and paint. The adhesive is strong — it can lift wallpaper or pull paint when removed. If that's a concern, mount the channel with screws instead of relying on adhesive.
- Air circulation. Strips installed in tight enclosed channels run hotter and die faster. Aluminum profiles or any opening for airflow help significantly.
- Quality of the strip. Cheap unbranded strips often drift in color, burn out early, and have poor heat dissipation. Buying from a reputable manufacturer is worth the price difference.
My personal preference is Philips LEDs — I've used their bulbs and strips for years and never had a failure.
Cutting LED Strip Lights
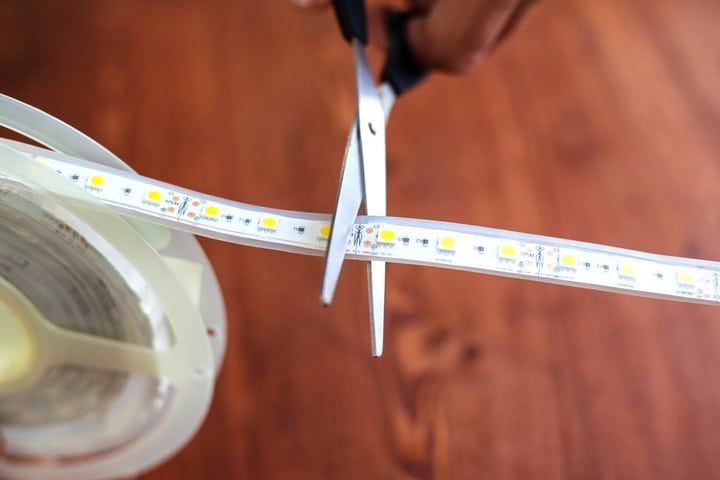
An LED strip is a series of small parallel circuits, each containing a few LEDs and a current-limiting resistor. The strip can only be cut between these circuits — at marked cut lines, usually shown as a scissor icon and a thin solid line crossing the copper pads. Cut anywhere else and the segment on each side of the cut goes dark.
Use sharp scissors and cut straight across at the marked line. The cutting interval depends on voltage:
- 12V strips — cut every 3 LEDs, around every 5 cm. More cut points means better fit around tight corners.
- 24V strips — cut every 6 LEDs, around every 10 cm. Fewer cut points but better for long straight runs.
If the install has lots of corners, 12V is more forgiving; for long straight runs (under-cabinet, ceiling perimeter, hallway), 24V wastes less length and drops less voltage.
Connecting Multiple Strip Lights
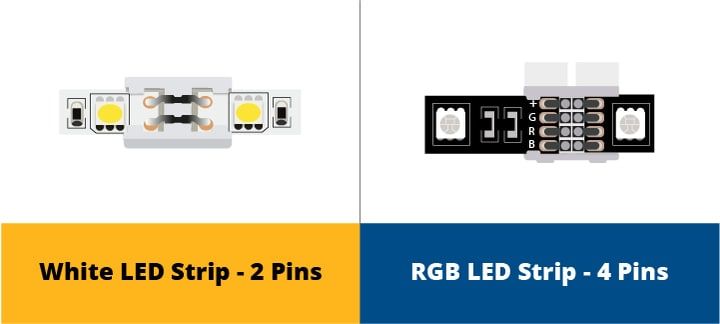
There are two ways to join two strip segments: solderless connectors (straight, 90°, or T-tap) and direct soldering. Connectors are faster and reusable; soldering is more reliable in the long term and gives a slimmer joint.
For solderless: peel back the plastic over the copper pads, slide the strip into the connector, and clamp it down — checking polarity (+ to +, − to −) and color order on RGB strips.
For soldering: tin both the strip pads and the wire ends first, then touch them together with the iron. Black goes to negative, red to positive. Cover the joint with heat-shrink tubing if the strip will be exposed.
Voltage Drop And Maximum Run Length
Daisy-chaining too much strip from one feed causes voltage drop: the LEDs near the supply burn at full brightness, and the ones at the far end look dim or yellow.
- 12V strips — keep single runs to roughly 16 ft (5 m). Beyond that, drop becomes visible.
- 24V strips — comfortable single runs up to roughly 32 ft (10 m).
For longer runs, three options: feed the strip from both ends, inject power partway down the run, or wire segments in parallel back to the supply (each segment connected directly, not through the previous segment). Most supplies have one positive and one negative output, so parallel wiring needs a wire splitter terminal.
Don't Mix 12V And 24V Strips
Connecting a 24V strip to a 12V supply gives an underpowered strip that won't light. Connecting a 12V strip to a 24V supply will overdrive it — the LEDs heat up rapidly and can ignite. Always confirm both the strip and supply voltages match before powering on.
Can LED Strip Lights Run 24/7?
LED strips run cool compared to incandescent and halogen lighting, but they aren't heatless. A heat sink (or aluminum channel) keeps the diodes within their rated operating temperature.
With a properly heat-sunk strip and a quality power supply, running 24/7 is safe. The bigger long-term wear point is usually the power supply itself — the transformer runs warm and degrades faster than the LEDs. Switch the strip off when not in use to extend its life and protect your sleep.
Cheap strips and cheap supplies are the genuine risk. They overheat, drift in color, and in the worst cases short and ignite. Spending a little more on a known brand removes most of that risk.
FAQ
Do LED strip lights require aluminum heat sinks?
LED strips need somewhere for heat to go. Without a heat sink, the strip's temperature climbs and the diodes lose efficiency and lifespan — they often won't feel hot to the touch but the damage is cumulative. Aluminum channels are the standard choice because they offer the best balance of thermal conductivity and cost. Copper is more conductive but expensive; thermoplastic profiles are cheaper but don't dissipate heat as well.
Are LED strip lights waterproof?
Some are. Look for the IP rating on the box: IP65 handles splashes and is fine for bathrooms (away from direct shower spray) and covered outdoor areas. IP67 survives temporary immersion and direct rain. IP68 is rated for continuous submersion (pools, fountains). IP20 strips have no protection and are indoor-only. If no IP rating is listed, assume the strip is not waterproof. Note that even on a waterproof strip, the cut ends and connectors are not sealed — you'll need to seal them yourself with shrink tubing or silicone.
Are LED strip lights easy to remove?
Yes, but careless removal can damage paint or wallpaper. Start at one corner and use a flat tool (a credit card works) to lift the adhesive away from the wall a section at a time. A hairdryer on low heat softens the adhesive — use it for a few seconds at a time, not long enough to damage the LEDs.
Are LED strip lights dimmable?
Most standard single-color and analog RGB DC strips are dimmable using a PWM dimmer wired between the supply and the strip. Don't use a regular wall dimmer on the AC mains side of the supply — it will damage most LED drivers. Mains-voltage AC strips need a TRIAC or ELV dimmer rated specifically for that strip; check the manufacturer's compatibility list. Addressable strips (WS2812B and similar) are dimmed in firmware by the controller, not by an in-line dimmer.
What's the difference between RGB and addressable LED strips?
Standard RGB strips set every LED to the same color at once — the whole strip is red, or the whole strip is blue. Addressable strips (WS2812B, SK6812, APA102) give per-pixel control, so every LED can be a different color. That enables animations, gradients, chase effects, and screen color sync. Addressable strips need a dedicated controller (an ESP32 running WLED, or a smart-home hub) and aren't dimmed by a standard PWM dimmer.
What CRI should I look for in an LED strip?
For accent or decorative lighting, CRI 80 is fine. For under-cabinet kitchen lighting, vanity lighting, or anywhere color accuracy matters (food prep, makeup, art), look for CRI 90 or higher. Premium strips advertise CRI 95+ and often quote R9 (the deep-red sample), which is the value cheap strips most often fail.
Final Words
Picking LED strips comes down to a handful of decisions: form factor (standard, rope, or flex), color (white at the right Kelvin, or RGB/RGBW for color), brightness in lm/m matched to the job, voltage matched to the run length, an IP rating that suits the location, and a power supply sized with 20% headroom. Add an aluminum channel for anything that will be visible or run hot, and a sensible brightness for the room.
Get those right and the install is the easy part — measure, clean, peel, stick, power on. The result is lighting that's modern, efficient, and shaped exactly to your space.